
How to Fix a Wicker Chair Seat
This post contains affiliate links. As an Amazon Associate, we earn from qualifying purchases.
To fix a wicker chair seat, start by cleaning your workspace and inspecting for any cracks. Gather your tools, then cut out the old wicker using a utility knife, being careful not to cut yourself. Next, repair any cracks in the frame with strong glue and clamps. For the new wicker, dampen it, fit it into the groove, and use wedges to secure it tightly. Finally, apply a nice finish to complete the restoration. For those interested in a deeper understanding, further explanations and tips will follow in the article.
Essential Facts in 30 Seconds
- Clean the workspace and inspect the chair for any cracks.
- Apply wood glue to damaged areas before starting repairs.
- Use a utility knife to remove old wicker or cane material by scoring around the seat.
- Repair frame cracks with strong glue and clamps to ensure stability.
- Dampen new cane webbing for easier handling.
- Center and secure new webbing in the groove using wooden wedges.
- Finish with a protective coat of polyurethane or shellac.
- Regularly clean the chair to maintain its integrity.
Preparing for Wicker Chair Seat Repair
To fix your wicker chair seat, start with a clean workspace. Use a damp cloth to wipe down the chair frame. This removes dust and dirt.
Check for splits or cracks. A wobbly chair isn’t safe. If you find any damage, apply wood glue to those areas. It’s important to ensure that the chair remains structurally sound during the repair process. Ensure you also evaluate damage thoroughly to identify all areas needing attention. Properly assessing the condition of your chair can help you determine necessary repairs and extend its lifespan.
Next, organize your tools. Keep pliers, a small hammer, and a sharp utility knife close by. A neat workspace helps you work better. Make sure your area is clean and dry. Wicker furniture is known for its durability, so addressing any issues promptly ensures longevity.
Tighten any loose screws or nails. A secure chair is a happy chair.
Sand down any rough spots. This prepares the surface for new wicker. Your chair will look great once you finish!
Removing Old Wicker or Cane Material
Ready to remove that old wicker or cane material? Start by getting a sharp utility knife or scissors. Cut out the old cane webbing from the center of the seat. This clears your workspace.
Score around the chair seat to loosen any varnish or glue. Score the entire groove. This helps release the spline easily. Chair restoration is a valuable skill that enhances the longevity of antique and vintage furniture.
Next, remove the spline. Start at the back of round seats or the front rail of trapezoidal ones. Use a caning chisel and gently rock it upward to pry the spline up. A few light taps with a hammer can help, too. Patience is important.
Stubborn glue? Use vinegar or denatured alcohol to soften it.
With the right tools and techniques, you’ll have that old material off in no time. You can do this!
Repairing Frame Cracks and Reinforcement
Get your wicker chair ready for use by fixing those frame cracks!
First, check for weak spots. Look closely at the joints. Find out how bad the damage is. Wicker furniture can be made from both natural and synthetic materials, so it’s important to know what type you are working with for the best repair method.
Use strong glue to repair the cracks. Clamp the pieces together to hold them in place. This will make your chair sturdy again.
Enjoy cozy moments without worry!
Identifying Frame Weaknesses
Before making repairs, check your wicker chair’s frame for weaknesses.
Inspect the material quality first. Strong materials like aluminum last longer and resist rust.
Next, look at the joints and connections. Tight and secure joints keep the chair stable.
Look for any cracks or damage. Assess the severity of the cracks.
Also, ensure the frame can hold the weight you plan to put on it. Stability is very important for safety.
If you spot any problems, reinforce those weak areas.
Fixing issues early saves time and effort later.
Keep your chair sturdy and safe. No one wants a wobbly seat!
Applying Repair Techniques
Fixing cracks in your wicker chair is easy! For small cracks, use super glue to hold the edges together. For larger cracks, wood glue works better. Clamp it down while it dries for a strong bond.
Before adding screws, pre-drill holes. This step helps avoid splitting the wood. No one wants unexpected cracks!
Place screws carefully, and countersink them for a smooth finish. This way, they won’t catch on clothes.
After repairs, sand the area. Use a matching stain to blend the fix. Your chair will look like new! Enjoy your refreshed wicker chair!
Ensuring Structural Stability
After fixing those annoying cracks in the wicker, focus on keeping your chair strong. Check the frame closely for any splits. Pay special attention to where the arms and legs join.
If you spot cracks, use wood glue that matches your chair. Clamp the cracks tightly for a strong bond. Applying new wood glue ensures a lasting repair. To reinforce the structure, consider repairing cracked legs using wood glue and clamps to secure the bond.
To add strength, insert screws or dowels across the cracks. This gives extra support. Good load distribution helps stop future breaks. Additionally, ensure the chair is properly assessed for any further damage before applying any repairs.
Once everything is glued and braced, let it cure for one or two days. Patience pays off!
Treat your chair with wood conditioner to keep it looking great. You did a fantastic job!
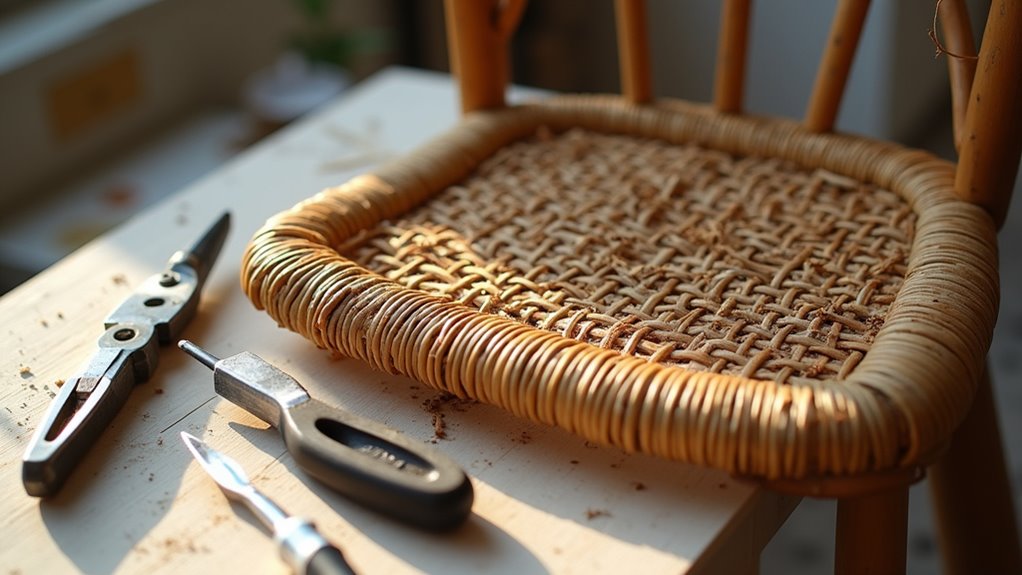
Installing New Cane or Wicker Weaving
Installing new cane or wicker weaving on your chair transforms it into a stylish piece.
Start by removing old cane webbing. Clean the groove well. Dampen the new cane webbing. This makes it easier to handle.
Lay the webbing over the seat. Center the weaving patterns correctly. Make sure the shiny side is up.
Press the webbing into the groove. Start at the back and front. Then move to the sides. Use wooden wedges to hold it in place.
Trim any excess webbing to about 1 to 2 inches. Once secure, press it down one last time. Make sure it’s flush.
You are the weaving expert! With patience, your chair will look amazing. Enjoy your project!
Weaving Techniques and Tensioning
Weaving a wicker chair seat is a fun and rewarding project. Start by securing your warp strands tightly around the seat frame from front to back.
Next, weave your weft strands side to side. Use simple patterns like over-under or basket weave. Keep tension in mind. Your warp strands should be taut but not too tight. If they’re too tight, they might snap!
To keep everything balanced, work from the center or a corner. Check for slack as you go. If you see any loose spots, gently stretch the strands. Don’t force them!
After finishing, do a final check. Tighten any loose ends. With practice, you’ll master these weaving patterns. Your chair will look great. No ninja stain removal needed this time! Celebrate your effort!
Finishing and Maintenance Tips
Now that you know those weaving techniques, let’s talk about keeping your wicker chair looking great!
First, use finishing techniques. A thin coat of polyurethane or shellac helps preserve the chair’s beauty. It also keeps the material flexible. Make sure to let it cure fully before sitting down. Additionally, applying a protective finish can help guard against future wear and tear.
For maintenance, gently clean your chair with a soft brush or vacuum. This will remove dust easily. Avoid harsh chemicals. Use mild soap and water instead. Additionally, regular cleaning routines can help maintain the chair’s condition over time.
Dry the chair completely after cleaning. Check for loose strands and repair them right away.
Notice the cane stretching? Mist it lightly with water. Let it dry overnight to tighten it up.
Keep your chair cozy and out of direct sunlight to make it last longer. Happy fixing!
Frequently Asked Questions
How Much Does It Cost to Repair a Wicker Chair Seat?
Repairing a wicker chair seat costs between $100 and $500. The final price depends on the type of weaving and materials used. Labor costs also matter. The condition of the chair frame plays a role too. Look at these factors for an accurate estimate. Wicker chairs can last a long time with proper care. Repairing them is often worth the investment. A well-repaired chair can look great and be comfortable again.
Can I Use Synthetic Materials Instead of Natural Cane?
You can definitely use synthetic materials instead of natural cane. Synthetic materials are strong and can handle tough weather. They work great for outdoor furniture. They last a long time and don’t get damaged easily.
Natural cane has its own charm. It looks classic and feels warm. Many people love its authentic style. Choose what fits your needs best. Whether you want durability or classic beauty, both options are good.
How Long Will the Repair Process Take?
Repair time can be different based on the damage. Sometimes, it takes a few hours. Other times, it can take a full day. Repair includes soaking, weaving, and drying. Complete drying is important for the best results. Some repairs may need special drying techniques. Always ask for an estimate. This helps you plan your time better. Understanding the process makes it easier. Patience is key during repairs.
Where Can I Find Replacement Cane or Wicker Materials?
You can find replacement cane or wicker materials at specialty suppliers. Van Dyke’s Restorers and Peerless Rattan are great options. They have a wide selection of wicker alternatives. You’ll easily find the right supplies for your project there. Enjoy restoring your furniture with these quality materials!
Can I Paint or Stain the Wicker After Repair?
Many homeowners choose to paint or stain their wicker. It gives furniture a fresh and updated look. After repairs, you can paint or stain your wicker. This can enhance both its durability and appearance.
You have several techniques and options to consider. Use spray paint for an even coat. Or, try a brush for more control. Stains can add rich color while showing the wicker’s texture.
Before you start, clean the surface well. Remove dust and dirt to help the paint or stain stick. Let it dry completely before using the furniture again. This way, you ensure a beautiful finish. Enjoy your revamped wicker!
Conclusion
You did it! With some patience and skill, you transformed that old wicker chair. Now it’s a cozy spot for sunny afternoons and lazy reading. Imagine sinking into that fresh seat with a cool drink in hand. Enjoy the results of your hard work. Keep up with maintenance to care for your chair. A little attention goes a long way. Show off your handiwork and enjoy your comfy creation!