
How to Repair a Wicker Chair Seat
This post contains affiliate links. As an Amazon Associate, we earn from qualifying purchases.
To repair a wicker chair seat, begin by cutting away the old cane using a sharp knife. Next, soak your new cane strips in warm water until they become flexible, then trim them to fit the seat. Lay the soaked cane over the seat and utilize wedges to press it into the groove. For added support, don’t forget to apply spline and glue. If your chair’s frame is unstable, reinforce it by gluing and clamping it tightly. More detailed tips and techniques will be provided later in the article for those seeking further insight.
Essential Facts in 30 Seconds
- Assess and clean the chair to locate damaged areas before repairs.
- Cut out old cane webbing and lift it from the groove.
- Soak replacement cane in warm water for flexibility before cutting.
- Press new cane webbing into the groove using wooden wedges for installation.
- Apply wood glue to cracks and secure loose joints with screws for structural repairs.
Tools and Materials Needed
Ready to repair a wicker chair seat? Gather essential tools and materials for a smooth project.
Start with scissors or a wire cutter. These are great for trimming cane webbing. A utility knife with a sharp blade is perfect for precise cuts. A measuring tape will ensure everything fits just right. Additionally, it’s crucial to evaluate damage before starting the repair process to understand what needs fixing. A thorough cleaning process will also help you identify all areas that may require attention.
Next, choose your materials. Pre-woven cane webbing is easy to work with and looks good. For a challenge, try rattan cane strips for handweaving. A strong adhesive like Elmer’s glue will keep everything secure. A rubber mallet is useful for tapping the spline into place without damage. Remember that natural materials like rattan and cane enhance the overall aesthetic of your project and align with current design trends.
With these tools and materials, your wicker chair will look brand new. Time to get started and enjoy the process!
Removing Old Seat or Cane
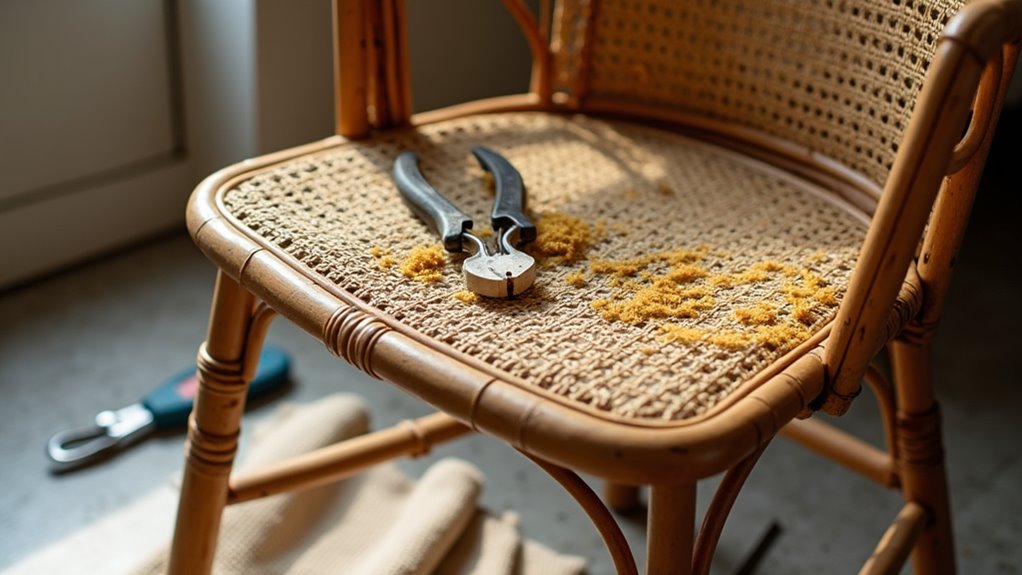
Time to remove that old cane seat! Start with a sharp utility knife or scissors. Cut out the center of the old cane webbing. Score around the chair seat to loosen any varnish, paint, or glue. Be careful not to damage the wood.
Chair restoration is a valuable skill that enhances the longevity of antique and vintage furniture.
Next, remove the spline. Begin at the back of round seats to avoid frame damage. Use a chisel to gently tap and pry it up in small pieces.
Once the spline is out, lift away the old cane webbing. If it’s brittle, take your time to avoid a mess.
Clean the groove with an awl to scrape away leftover glue. Make sure it’s smooth and dry.
Now, you’re ready for the next step. Your chair will look great again!
Preparing Replacement Cane or Wicker
Get your replacement cane ready! Soak the cane material in warm water for 20 to 45 minutes. This step makes the cane flexible and prevents breakage. After soaking, trim the strands to fit your groove. Leave some extra length for adjustments. Remember that hand cane is a more complicated project than pressed cane, so ensure you’re prepared for the task at hand. Think of it like adding a cozy blanket to your chair!
Soaking Cane Material
Soaking cane material is very important for your wicker chair repair project.
Start by filling a sink, tub, or bucket with room temperature or slightly warm water. Fully submerge the cane strips for about 30 minutes. This soaking makes the cane flexible but not too soft.
During the weaving, keep the cane wet. You can cover it with a damp cloth to keep it pliable. Proper soaking helps the cane last longer, so don’t skip this step! Additionally, ensure you measure the length of the cane strips needed before starting the repair.
Before placing the cane on the chair seat frame, wipe off any extra water. Make sure to align it nicely.
You’re on your way to a strong and beautiful seat. Great job taking on this project!
Trimming Cane Strands
Trimming cane strands will help bring new life to your wicker chair!
Start by placing the replacement cane square at the front edge of the chair seat. Make sure everything lines up correctly. Grab sharp scissors or a chisel for the job. Trim just below the groove edge. Go slowly to avoid mistakes. Aim for smooth, clean cuts. No tearing or fraying allowed!
Check that the strands are even all around. This keeps the tension balanced. After trimming, carefully remove any loose pieces. This helps prevent splintering.
Finally, check that the edges are flush. This ensures the spline fits snugly. With these steps, your chair will look as good as new! Great job on your hard work!
Installing Replacement Seat
Installing a new seat can be fun and easy. Start by laying your pre-soaked cane webbing over the chair seat. Make sure the front row sits nicely in the groove. Check how it looks. It should be neat, like a well-made pizza!
Next, take wooden wedges and a hammer. Gently press the cane into the groove. Begin at the center of each side. This keeps everything straight. Work your way around the seat. Trim any extra webbing with sharp scissors. Be careful not to cut too close!
Now, it’s time to insert the damp spline into the groove. Use a spline roller for this step. For extra strength, put a little water-soluble glue in the groove before adding the spline. This helps the seat last longer.
After everything is in place, let it dry completely. You’re now one step closer to enjoying your comfy chair!
Repairing Structural Damage
Notice your wicker chair sagging or showing wear? Time to repair it!
Start with a damage assessment. Check for broken or loose weaves. Look for cracks or splits in the frame. Loose glue joints can affect the chair’s strength. If the frame has cracks, reinforce it before weaving.
Next, clean the chair. Remove dirt and debris. Think of it as a spa day for your chair!
Sand down rough edges for a smooth repair surface. Use wood glue or super glue on any cracks. Clamp them tight while they dry.
Check the frame too. Use screws or dowels to secure it if needed. Soon, your chair will be sturdy and stylish again!
Alternative Wicker Repair Techniques
After reinforcing that sturdy frame, explore some alternative wicker repair techniques. These methods can give your chair a fresh look.
Soak your replacement cane or natural rattan in lukewarm water for 20 to 30 minutes. This softens the fibers, making them easier to handle. Shake off any extra water. You want to keep your seat strong!
Cut your material with extra length for a snug fit. Use wooden wedges to press and hold the cane in the groove. Adjust it until it looks just right.
For a fun twist, try using twisted paper strips. This creates a unique wicker texture. Weave them through the frame like a pro!
With these tips, your chair will look fabulous. Get it ready for many cozy sits. Let’s make it shine!
Frequently Asked Questions
How Do I Choose the Right Replacement Material for My Chair?
Choosing the right replacement material for your chair is important. Think about durability first. How often will you use the chair? For outdoor chairs, synthetic materials work well. They resist weather and last longer.
For indoor chairs, natural fibers are a great option. They offer comfort and a cozy feel. Consider how much maintenance you want. Natural materials may need more care.
Look at your priorities. Do you want comfort or durability? Decide what matters most to you. The right material can make your chair feel new again. Enjoy your choice!
Can I Use Fabric Instead of Cane or Wicker for My Chair Seat?
You can use fabric instead of cane or wicker for your chair seat. Fabric makes chairs look better and feel comfortable. It also allows for customization. Many types of fabric are strong and last a long time.
Make sure to secure the fabric well to get a neat look. Use a staple gun or strong glue for best results. Choose colors and patterns that match your style. This way, your chair will be both stylish and cozy. Enjoy your new chair seat!
How Can I Prevent Future Damage to My Wicker Chair?
To keep your wicker chair looking great, follow these easy tips. First, clean it gently. Use a soft brush or cloth to avoid damage. Next, apply a protective coating to shield it from wear and tear. Store your chair inside when not in use. This keeps it safe from moisture and sunlight. Check your chair regularly for any signs of damage. Fixing small issues early can prevent bigger problems later. With these steps, your wicker chair will stay beautiful and last a long time.
What Is the Best Way to Clean My Wicker Chair?
Cleaning your wicker chair is easy and rewarding. Start with a gentle cleaning solution. Mix mild soap with warm water. Use a soft brush to scrub away dirt. Be gentle to avoid damaging the wicker. Rinse carefully with clean water. Make sure no soap is left behind.
Let your chair dry in a shaded area. Sunlight can cause fading. Regular cleaning helps keep your chair looking new. It also makes it last longer. Enjoy your beautiful wicker chair for years to come!
How Often Should I Reapply Glue to My Wicker Chair?
Reapply glue when you see loose strands or damage. Check your wicker chair regularly. Under normal conditions, you should not need to glue it more than once a year. Use the right type of glue for a strong bond. Keep your chair looking good and sturdy. Regular care helps it last longer. Enjoy your comfortable wicker chair!
Conclusion
You’ve transformed that old wicker chair into something special! Each step was a small journey. Your space feels cozier now. Next time your chair wobbles or the seat looks worn, you know how to fix it. Great job taking on this project! Enjoy your comfy chair. Maybe have a snack, but be careful of ketchup spills!