
How to Refabric a Chair
This post contains affiliate links. As an Amazon Associate, we earn from qualifying purchases.
To give your chair a fabulous makeover, start by inspecting it for any damage and choose a durable fabric that complements your room’s decor. Next, measure everything accurately and disassemble the chair for a thorough cleaning. Replace the foam with comfortable padding, then attach the new fabric, ensuring you start from the center to avoid puckering and keep everything tight. Your chair will look fantastic! For those wanting more detailed guidance, I’ll share additional tips and insights throughout the article.
Essential Facts in 30 Seconds
- Assess chair for damage before starting reupholstering.
- Choose durable, stain-resistant fabric that matches the room’s decor.
- Measure accurately to ensure seamless installation.
- Calculate total fabric needed, including allowances for patterns and errors.
- Replace old foam with suitable type for comfort; shape and secure it properly.
- Attach new fabric starting from the center to prevent puckering.
- Check for even tautness and stability upon completion.
Assessment and Preparation
Before you start to refabricate your chair, take a close look at it. First, check for damage. Look for torn or stained fabric. Check for loose legs or flat cushions. If your chair squeaks, pay attention! A loose leg can compromise the chair’s stability, making repairs necessary before proceeding with reupholstery.
Next, inspect the frame. Solid wood and good craftsmanship mean your chair can be reupholstered easily. Quality furniture is better suited for reupholstery, so consider if your chair meets this standard. Additionally, assess the fabric for durability to ensure it can withstand regular use. A functioning height adjustment lever is also a key aspect to verify before beginning any refabrication process to ensure overall stability and comfort.
Think about the cost of repairs versus buying a new chair. If repairs cost too much, it might be better to shop for a replacement. If your chair holds sentimental value, saving it’s worth the effort.
Gather your tools and prepare to disassemble the chair. Wear protective gear for safety.
Now you’re ready to start this project. Roll up your sleeves! You’re about to turn that sad chair into a beautiful piece.
Fabric Selection and Measurement

Pick fabric for your chair with durability in mind. You want it to last. No one likes a fabric that wears out quickly. Consider essential fabric features like stain resistance and UV protection to ensure your upholstery can withstand daily use. Additionally, choosing durable fabric will help maintain the chair’s appearance over time. Remember to select fabric that can be easily cleaned and maintained for optimal longevity. For added comfort, consider using foam padding underneath the fabric to enhance the seating experience.
Measure carefully to get the right size. Patterns can be tricky. They may need extra attention for a good match. Spills happen, like ketchup on your chair. Choose a fabric that resists stains. Look for easy-to-clean options. This keeps your chair looking fresh. Enjoy your comfy chair for years to come!
Choosing Durable Fabrics
Choosing durable fabrics for your chair is important and easy. Focus on materials with high durability ratings. Leather and high-performance synthetics like Crypton are great options. They resist spills and scratches well. Additionally, consider fabrics with high abrasion resistance to ensure they withstand daily wear and tear. Upholstery fabric can also enhance the longevity of your seating. For optimal comfort and aesthetics, make sure to select new foam that complements the fabric choice. When selecting your fabric, aim for durable materials that will support long-term use while maintaining their appearance.
Pick a color that matches your room. Neutral tones blend in nicely. Bold colors can add style but may show wear more quickly. Patterns like stripes can hide stains better than solid colors.
Accidents happen. A spill? Just think: “Oops, spilled ketchup? Let’s make that stain vanish!”
With the right fabric, your chair can look fabulous for many years.
Calculating Fabric Requirements
Calculating fabric for your chair is straightforward. Start by measuring the length, width, and height of the seat, backrest, and arms. Remember to add an inch for seam allowance. Additionally, preserving the seat’s shape during the measurement process is crucial for a proper fit.
Next, divide the chair into sections to find the surface area of each part. Add these areas together to get the total fabric needed. Additionally, measuring the chair accurately ensures you won’t run short on fabric.
To estimate yardage, divide the total fabric area by the fabric width, typically 54 inches. Round up to the nearest yard. This extra fabric will help cover mistakes. For chairs with complex shapes, add a little more fabric to ensure you have enough. Additionally, consider using old leather as a template to create a precise fit when cutting new upholstery. You can do this!
Pattern Matching Techniques
After determining how much fabric you need, focus on pattern matching techniques. This step is crucial for pattern alignment and visual harmony.
Start by finding the fabric’s center and marking it. For stripes or plaids, measure the pattern repeat carefully. This ensures you cut the right sizes. Additionally, attaching new fabric requires careful handling to maintain the pattern’s integrity. Remember to use a staple gun to secure the fabric tightly for a professional finish.
Pinning and basting before sewing help check alignment. Larger patterns often need more fabric, so plan wisely. Additionally, be sure to consider replacing foam if your chair seat requires extra support for comfort.
Take your time with this process. The results will be stunning. A perfectly matched chair can become your upholstery masterpiece!
Disassembly and Cleaning
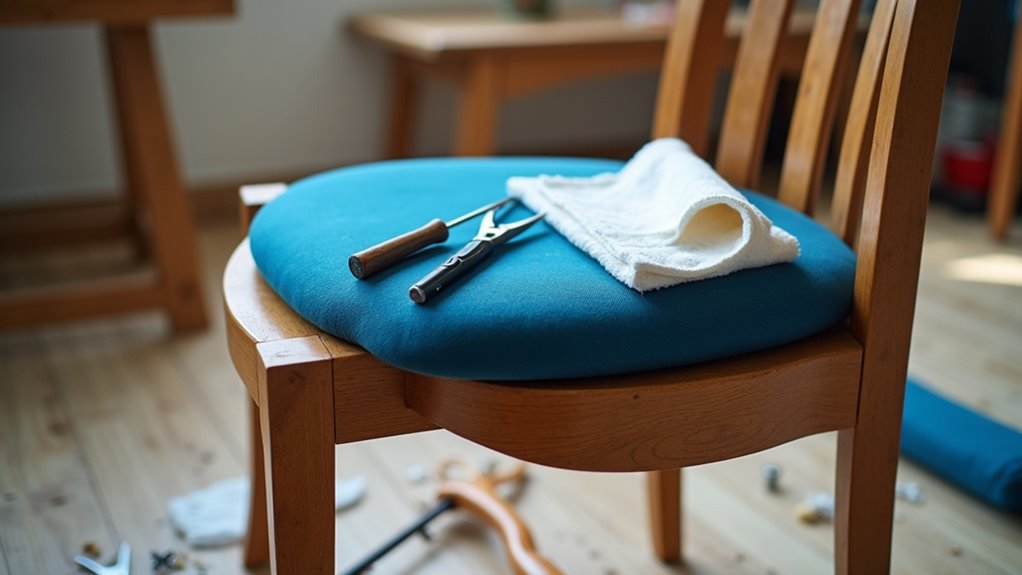
Disassembly and cleaning can feel like opening a surprise gift. Each part has its own story! Gather your tools and let’s get started.
Here’s what you’ll need:
- Screwdriver and wrench
- Rubber mallet
- Containers for organizing screws
- Gloves for handling old parts
- Cleaning supplies for after disassembly
Begin by carefully removing the seat and backrest. Look for hidden screws as you work. Make sure to inspect the foam condition after seat removal, as it may need repairing a broken leg if damaged.
Next, detach the armrests and casters. Sometimes they can be tricky. A gentle tap with the mallet can help.
Once everything is apart, it’s time to clean! Wipe down metal and plastic parts with a damp cloth. For tough dirt, use isopropyl alcohol. Additionally, pay special attention to any wobbly joints that may need repair during reassembly.
Don’t forget to vacuum the cushions!
Let everything dry completely before reassembling. You can make that chair shine bright!
Foam Replacement and Padding
Now that your chair is clean and taken apart, it’s time for foam replacement and padding.
Pick the right foam type for comfort. Soft foam is great for relaxing. Firm foam provides good support.
Adding padding makes a big difference in comfort. Let’s go over installation techniques. This will help your chair feel cozy and inviting.
Enjoy your refreshed chair!
Selecting Appropriate Foam Type
Finding the right foam for your chair makeover is important. Think of it like picking ice cream. You want the best choice!
Here are some foam types and their densities to help you make a decision:
- Polyester Fiberfill: This foam is soft and machine washable. It’s great for light use but not for heavy-duty tasks.
- Medium Foams (1.5-1.8 lb/ft3): These are perfect for everyday seating comfort. They balance softness and support.
- High-Density Foam (2 lb/ft3+): This type is strong and offers excellent support for your weight. It lasts longer too.
- Blue Foam (1.9 lb/ft3): This foam is durable and looks good. It works well for many different projects.
- Firm Foams (2.8 lb/ft3): Ideal for dining chairs. They provide extra support and stability.
Choose wisely to enjoy your new chair!
Padding Installation Techniques
Prepare to dive into the exciting world of padding installation!
Start by cutting your webbing strips. Make them about 20cm longer than your chair frame. Attach these strips tightly. A web strainer helps achieve the perfect tension.
Next, lay down a hessian layer. This fills gaps and adds comfort. Choose the right foam size. Shape it to fit the chair’s contours, and remember to evaluate the condition of the foam padding after removing the old fabric. Use glue or staples to secure the foam in place.
Wrap your fabric starting from the center. Move outwards and staple evenly. This creates a smooth finish. Tuck the corners in neatly. It feels satisfying, like wrapping a present!
Trim any excess fabric. Finally, reattach a dust cover underneath.
With these steps, you’ll enjoy a comfy and stylish chair!
Ensuring Comfort and Support
Foam replacement and padding can give your chair a cozy makeover. A comfortable chair supports your body well.
Here are some tips to help you choose the right foam:
Select high-density foam. It lasts longer and stays in shape. Memory foam is another option. It hugs your body for a snug feel.
Think about how you use your chair. This helps decide the firmness you need. Custom-cut foam can keep your chair ergonomic.
Always test foam samples. Find the right comfort level for you. Enjoy your new, comfy chair!
Fabric Attachment
Get ready for some fun with fabric attachment! Start by cleaning your chair platform. No dust bunnies allowed!
Lay down webbing and tack it tightly to the seat frame. Add muslin as a smooth base. Fill any gaps with hessian for extra comfort.
Next, focus on staple techniques. Begin stapling at the center of each edge. This prevents puckers.
Fold the corners neatly, just like wrapping a gift. Staple them securely. Keep staples evenly spaced for a nice look. If something isn’t aligned, remove the staples and adjust.
Finally, trim any excess fabric for a clean finish. You’re doing great! Keep up that energy!
Final Touch and Inspection
After all your hard work, it’s time to finish up with some final touches and a careful inspection. This step is key to making sure your chair looks great and stays strong!
- Trim any extra fabric close to the staple line.
- Tuck and secure corners for a smooth finish.
- Check for even tautness—no wrinkles allowed!
- Look for fraying fabric and clip any loose threads.
- Test the chair’s stability—no wobbling or creaking!
Next, inspect your chair closely. Check for pattern alignment, clean stitching, and any stains.
Make sure all fasteners are tight and the fabric is ready to use. Don’t forget to wipe off any dust from your project!
You’ve done an amazing job. This last check makes sure your chair is as good as new.
Now, sit back, relax, and enjoy your creation!
Frequently Asked Questions
How Much Time Does It Take to Refabric a Chair?
Estimating your chair refabrication time is important. A dining chair takes about 1-2 hours. Average chairs need more time, around 8-14 hours. The time depends on size and complexity. Your skill level also plays a big part. A simple chair is faster. A complex chair takes longer. Plan your project based on these factors.
Can I Refabric a Chair Without Prior Experience?
Refabricing a chair can be done by anyone, even with no experience. Many beginners succeed in simple projects. Studies show over 70% of newcomers finish their first task. Expect some mistakes along the way. It’s all part of learning.
Start by gathering your tools and materials. You’ll need fabric, a staple gun, scissors, and a screwdriver. First, remove the old fabric carefully. Take your time with this step. Measure the chair and cut the new fabric to size.
Staple the new fabric tightly. Make sure it looks neat. Then, reassemble the chair. Sit back and admire your work. Remember, practice helps you improve. Each project will boost your skills and confidence. Enjoy the process!
What Tools Are Essential for Beginner Upholstery Projects?
For beginner upholstery projects, having the right tools is key. Start with a staple remover to take off old staples easily. A sewing machine helps with sewing fabric pieces together. A soft tape measure is great for measuring your materials accurately.
Safety is very important too. Always wear safety goggles to protect your eyes. Gloves will keep your hands safe while working.
These tools will set you up for success in your upholstery projects. Enjoy your creative journey!
Where Can I Find Upholstery Fabric Locally or Online?
Shopping for upholstery fabric can be fun and easy. Local fabric stores have many types of fabric. You can see and touch the fabric before you buy it. This helps you choose the right texture and color.
Online stores also offer a huge selection. You can find fabrics that are hard to find in stores. Shopping online is convenient. You can browse from home and compare prices easily.
Check out popular websites like Fabric.com or Joann.com. Many local stores have websites too. Visit them to see what they offer. Don’t forget to check for local sewing shops as well. They often have unique fabrics.
Whether you shop locally or online, finding the right upholstery fabric is possible. Enjoy the process and happy sewing!
Is It Worth Hiring a Professional for Chair Reupholstering?
Chair reupholstering can be a smart choice. Hiring professionals brings many benefits. They have expert skills. Their work often lasts longer. This means your investment is worth it.
For complex chairs, their expertise is essential. Skilled craftsmen know how to handle tricky designs. They use quality materials. This ensures a great finish.
In the end, professional help can save you time and stress. You get a beautiful chair that fits your style. So, think about hiring a pro for your reupholstering project. It can make a big difference.
Conclusion
Refabricating a chair gives it new life. It transforms the old into something fresh and exciting. With your new skills, you can take on any chair project. Each step is important. Think of it as fitting puzzle pieces together.
Start by removing the old fabric and padding. Take your time to do this carefully. Next, choose a fabric that matches your style. Cut it to the right size. Attach the new fabric to the chair, making sure it is tight and smooth.
Don’t forget to add new padding for comfort. You want your chair to look good and feel great. Once you finish, step back and admire your work. Show it off to friends and family. You did a fantastic job! Celebrate your success!