
How to Repair a Broken Chair
This post contains affiliate links. As an Amazon Associate, we earn from qualifying purchases.
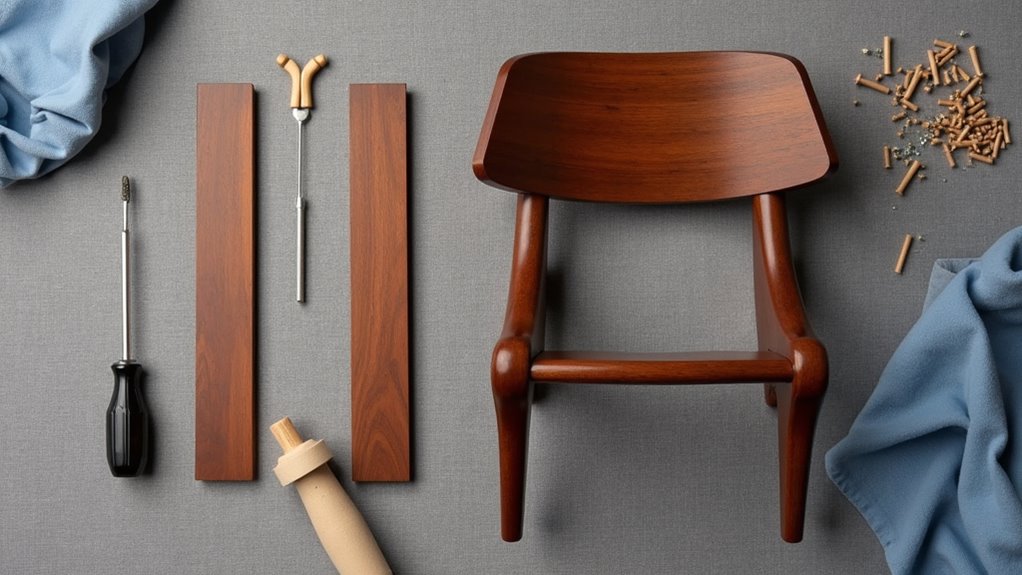
To repair a broken chair, start by identifying the damage, such as loose joints or cracked wood. Next, flip the chair over and unscrew the seat. Apply wood glue to the wobbly joints and clamp them tightly as they dry for optimal reinforcement. Afterward, sand the area for a smooth finish and select a stain that complements your style. For those interested in additional tips and techniques, further details will follow in the article.
Essential Facts in 30 Seconds
- Assess the chair for damaged parts, including hidden cracks and loose joints.
- Disassemble the chair by removing screws and fasteners; clean each part thoroughly.
- Use wood glue on loose or broken joints, ensuring surfaces are prepared for bonding.
- Secure repaired joints with clamps and allow glue to dry completely.
- Sand the wood surface and apply an appropriate stain for a polished finish.
Assessing the Damage
Staring at a broken chair means it’s time to assess the damage.
Start with damage identification. Check for broken parts, like legs or arms. Make sure the frame is still strong. Look for hidden damage, like cracks or splinters. These can cause problems later. Conducting regular assessments helps ensure compliance with quality standards for manufacturers. Additionally, inspecting for wobbly legs can reveal stability issues that need attention. Regularly checking for loose legs can help prevent further damage. It’s important to also look for visible damage that may compromise the chair’s integrity.
Next, assess usability. Can the chair hold weight without wobbling? If it feels safe, that’s good news. If it seems unstable, repairs are necessary.
Pay attention to every detail. Write down everything you find.
Spotted a ketchup stain? Time to clean it away! Use some cleaning supplies to make it vanish. You’re doing great. Keep going!
Disassembling the Chair
Check the damage on your chair. Now, it’s time to disassemble it!
First, flip the chair over. This gives you access to the underside. Grab your tools and look for screws or bolts. These hold the seat and backrest in place. Use the right screwdriver or wrench to remove them. Keep those small parts in a safe container. Losing them would be frustrating! It’s also crucial to inspect screws or fasteners for any signs of wear before removing them. If any screws are damaged, consider replacing them to ensure a secure fit.
Next, find the fasteners for the armrests and remove those too. Approach the disassembly process gently pull everything apart. Make sure the chair stays stable as you do this. It’s important to assess damage thoroughly before proceeding with repairs.
After separating the seat and backrest, give them a quick wipe for cleanliness.
Finally, check for any casters. Unscrew or unclip them. Don’t forget to clean those as well! You’re doing a great job. Soon, your chair will feel brand new!
Repairing Joints
Wobbly joints on your chair can be fixed!
Start by checking the damage closely. Identify what needs repair.
Grab some wood glue for the job. Apply the glue to the loose joints. PVA Glue is commonly used for woodworking and creates a strong bond between wood fibers. It’s important to ensure that the surfaces are well-prepared for reattachment before applying the glue. Additionally, make sure to tighten all screws holding the joints together to enhance stability during the repair process. A thorough inspection of the chair can also reveal any worn-out components that may need attention.
Next, use clamps to hold everything together. This helps the glue set properly. Think of it as a warm hug for your chair.
Let it sit for a few hours. Your chair will be sturdy again!
Assess Joint Damage
Evaluating joint damage is like being a detective for your chair. It’s important to find out what’s making those legs wobbly!
Start with a careful inspection of the joints. Here’s how to do it:
- Check for looseness. A moving joint needs attention.
- Look for breaks or cracks. These are big red flags!
- Pay attention to joints that creak or wobble. They show signs of wear, and tightening loose components can help restore stability. Regular checks can also help identify leaks in the gas cylinder before they become a major issue.
- Turn your chair upside down on a soft surface. This makes it easier to see the joints.
Taking these steps helps you find and fix any problems. A sturdy chair keeps you safe and comfortable! Remember, regular maintenance and care can prolong the chair’s lifespan and appearance.
Apply Wood Glue
After finding those wobbly joints and checking for damage, it’s time to apply wood glue.
Choose the right glue for your chair. Use epoxy for gaps. It fills spaces perfectly. For tight joints, PVA glue works well. Grab a brush to spread the glue evenly. Take your time to adjust things. Hydraulic cylinder adjustments can also be crucial for overall chair stability. A well-maintained gas lift cylinder can enhance the functionality of your chair.
Keep hide glue warm; it sets faster when cozy. Remember, less glue is better. Too much can be messy, just like ketchup on fries! Also, ensure that the wicker chair seat is thoroughly inspected for any damage before proceeding with repairs.
Let the glue dry and do its job. Great job tackling the repair! You’re closer to a sturdy chair!
Secure With Clamps
Securing joints with clamps helps your chair stay strong. Follow these simple steps for success:
- Select the right clamps: Use one-handed reverse clamps for easy disassembly. Pistol-grip clamps work best for angled legs.
- Set up on a flat surface: Place weights on the seat to keep everything stable.
- Align the clamp faces: Make sure they sit flat against the joint surfaces. This gives the best pressure. Tightening loose fasteners is crucial for stability during repairs.
- Check the angles: Use pivoting clamp heads for tricky spots. Balance the pressure on both sides for even support. It’s also beneficial to regularly inspect your chair for signs of wear and tear to prevent future issues.
Additionally, regularly inspecting your chair for signs of wear and tear can prevent future issues. Using these tips, your chair will be as good as new. Keep it steady and let the glue cure completely. Enjoy your repair!
Mortise and Tenon Repair
Got a broken chair with a mortise and tenon joint? Repairing it’s easier than you think!
Start by checking how bad the damage is. Gather tools like chisels and a drill. Soak the mortise in hot water to soften any glue. Use a chisel to clean it out. Measure the original fit for the right mortise depth.
Next, drill out the broken tenon pieces. Pare down the mortise walls. Test fit with spacers to ensure tenon alignment.
Rebuild the tenon by cutting away broken parts. Inject glue into the joint for added strength. Clamp it tight and let it set.
Finally, reattach everything. Make sure the pieces fit snugly. Give it a shake to check stability.
You’ve saved your chair like a DIY superhero!
Refinishing the Wood
After fixing the chair’s structure, it’s time to make the wood shine!
Start with sanding. This step smooths out rough spots. Use coarse sandpaper first. Then, switch to finer sandpaper for a soft finish.
Next, choose a stain color. Think about the vibe you want for your chair. Remember, a little stain goes a long way. Apply it carefully.
Let it dry completely. This will bring out the beauty of the wood. Enjoy your beautifully refinished chair!
Sanding Techniques Overview
Sanding your chair is a fun part of refinishing! Follow these easy steps to get started:
- Use coarse-grit sandpaper (3/0 or 4/0) to remove old finishes and bumps.
- Switch to finer grits (4/0 to 5/0, then 6/0) for a smooth feel. Always sand with the grain.
- Use long strokes for flat areas. For corners, use detail sanders.
- Clean up dust between grits with a vacuum or tack cloth.
Additionally, make sure to assess the condition of the existing padding before starting the sanding process, as it may require replacement.
With some patience, your chair will look brand new. It will shine like it just came from a furniture store!
Choosing the Right Stain
After sanding your chair, it’s time to pick a stain. You have two main choices: oil-based or water-based.
Oil-based stains are very durable. Water-based stains dry quicker and are easy to clean.
Darker stains make the wood grain stand out. Lighter stains keep a natural look. Use color theory to mix colors. For example, adding a bit of green can reduce red tones.
Always test your stain on scrap wood first. No one wants surprises!
Apply the stain evenly. Wipe off any extra. Your chair will look great! High-five!
Reupholstering the Chair
Reupholstering your chair can be an exciting project. It gives your chair a fresh look and makes a big difference in your space.
Start with fabric selection. Pick materials like leather or microfiber that match your style and how you’ll use the chair.
Next, gather your tools. You’ll need:
- A staple gun
- Upholstery shears
- Needle-nose pliers
- High-temp adhesive
Once you have your fabric and tools, cut the fabric to fit your chair. Attach it to the chair frame with staples.
For a nice finish, add decorative elements like piping or trim. Remember to check the condition of the upholstery foam before applying the fabric to ensure a comfortable seat.
Don’t forget to reattach any parts you took off.
Now, you have transformed that old chair into something new and exciting. Get ready to enjoy your chair’s new look!
Ensuring Safety and Stability
After reupholstering your chair, ensure it’s safe and stable for use. Check the chair’s structure every six to twelve months. Look for cracks, splits, or loose joints. Wiggle the parts. If they move, it’s a safety issue.
Fix loose joints carefully. Avoid screws or nails. They can cause more damage. Instead, take apart the joint. Use wood glue and clamp it tight until it dries. This keeps the joint aligned.
Always wear gloves and goggles while you work. Keep your workspace tidy. Remember the chair’s weight limit. Exceeding it can lead to problems. Remind users to sit properly and avoid rocking.
Regular checks after use catch problems early. This helps prevent accidents. Enjoy your repairs!
Regular Maintenance Tips
Keeping your chair in great shape is easy. A little care goes a long way. Follow these simple tips to make your chair last longer and look good.
- Weekly Wipe Down: Use a microfiber cloth to dust off all surfaces.
- Vacuum: Vacuum your chair weekly to remove dirt from fabric or mesh.
- Spot Clean: If you spill something, clean it right away. Test your cleaning solution on a hidden area first.
- Quarterly Deep Clean: Every few months, give your chair a thorough vacuum and wipe-down.
These steps will help keep your chair in top condition. Enjoy your clean and comfy seat!
Frequently Asked Questions
What Tools Are Essential for Repairing a Broken Chair?
Repairing a broken chair requires some basic tools. You will need screwdrivers, pliers, and clamps. These tools help you fix the chair properly.
Start by measuring the broken parts. This step ensures everything fits well. Use glue to join pieces together. Strong glue helps keep the chair sturdy.
Sanding the surfaces smooths out rough edges. This makes the chair look better and safer to use. Always check for any loose screws or joints. Tighten them to add extra support.
With these tools and techniques, you can make your chair as good as new!
How Can I Prevent Future Damage to My Chair?
Your chair needs care to stay strong and beautiful. Follow these simple tips to keep it in great shape.
First, clean your chair regularly. Dust and dirt can cause scratches or stains. Use a soft cloth and gentle cleaner.
Next, check for wear and tear. Look at the legs, arms, and seat. Fix any loose parts right away. This prevents bigger problems later.
Consider using protective coatings. They can guard against spills and scratches. Many stores sell sprays or wipes made for furniture.
Keep your chair out of direct sunlight. Sunlight can fade colors and damage materials.
Finally, don’t overload your chair. Each chair has a weight limit. Respect that limit to avoid breakage.
With these steps, your chair will last longer and look great. Enjoy your well-cared-for furniture!
Is It Worth Repairing an Old Chair?
Repairing an old chair is a smart choice. It makes the chair last longer and costs less than buying a new one. This way, you keep the chair’s unique style and quality. Repairing also helps the environment by reducing waste. It’s good for your wallet and the planet. Save money and enjoy a piece of history. Plus, a repaired chair can add charm to your home.
Can I Use Any Type of Glue for Wood Joints?
Not all glue works for wood joints. PVA glue is great for many projects. It dries clear and is strong. Epoxy is another option. It creates a very tough bond. This glue is good for hard-to-repair joints. Polyurethane glue is also useful. It expands as it dries, filling gaps well.
Choose the right glue for your needs. Each type of glue offers different strengths. Consider your project carefully. Select the glue that fits best. Strong joints lead to better results. Always read the instructions for the glue you use. This helps ensure a strong bond.
What Is the Best Way to Clean Upholstery Before Reupholstering?
Clean upholstery before reupholstering to ensure the best results. First, check the fabric type. Different fabrics need different cleaning methods. Always follow the manufacturer’s instructions for the best care.
Start by vacuuming the upholstery thoroughly. This removes dust and dirt. Next, deal with stains right away using spot cleaning. Use a suitable cleaner for your fabric type.
For a deep clean, use the right technique. Steam cleaning works well for many fabrics. Avoid harsh chemicals that can damage the material.
After cleaning, let the upholstery dry completely. This step is crucial before you begin reupholstering. A clean surface makes a big difference. Your new fabric will adhere better and look great.
Conclusion
Repairing a broken chair can be easy and fun. With patience and some basic skills, you can make it strong again. Small repairs now can prevent bigger problems later. Start by checking the damage. Is a leg loose? Or is the seat broken?
Gather your tools: wood glue, screws, a screwdriver, and clamps. Clean the broken areas. Apply wood glue to the cracks. Use clamps to hold it together. Let it dry for a few hours.
For a loose leg, tighten the screws. If the leg is broken, replace it. Cut a new piece of wood to size. Attach it securely.
Once finished, sand any rough edges. You can paint or stain the chair for a fresh look. Enjoy your hard work! Now, your chair is ready for use again. Celebrate your success!