
How to Repair a Patio Chair
This post contains affiliate links. As an Amazon Associate, we earn from qualifying purchases.
Repairing a patio chair is a straightforward task that can enhance its safety and appearance. Begin by checking for any cracks or wobbly legs, as these issues need to be addressed first for safety. If there are scratches or rust, simply sand them down and apply some primer and paint for a refreshed look. Cleaning the cushions can also significantly improve the chair’s condition. For slings, ensure they are fitted snugly and replace any loose hardware. If you encounter spills, such as ketchup stains, there are effective methods to remove them. Further details and tips will follow for those looking for a more comprehensive guide.
Essential Facts in 30 Seconds
- Inspect the chair’s frame, legs, and joints for damage to ensure stability and safety.
- Sand scratches and rust, then apply rust remover, primer, and repaint for protection.
- Clean cushions with mild detergent and repair with patches or new fabric if needed.
- Replace or tension slings by measuring, lubricating, and tightening bolts gradually.
- Tighten or replace damaged hardware to secure screws and fasteners for stability.
Inspecting for Damage
Inspect your patio chair for damage before using it. Start with the frame. Check for cracks or bends. A damaged frame may not hold your weight. Regularly inspect rusted frames to ensure longevity. Additionally, consider checking the seat condition to prevent any unexpected failures during use. It’s important to apply rust-inhibiting primer if you find any rust on the frame to extend its life.
Next, look at the legs. They should be strong and well-attached to prevent wobbles. Check the joints too. Loose joints can lead to problems. Ensure that the chair weight capacity check is performed to confirm safety.
Look for sharp edges or tripping hazards. You want to stay safe while enjoying your lemonade.
If your chair has cushions, check if they need washing or replacement. Look for wear and tear in the upholstery. Spilled ketchup? Make that stain go away!
A thorough check now leads to a comfy seat later. Enjoy your patio time!
Fixing Scratches and Rust
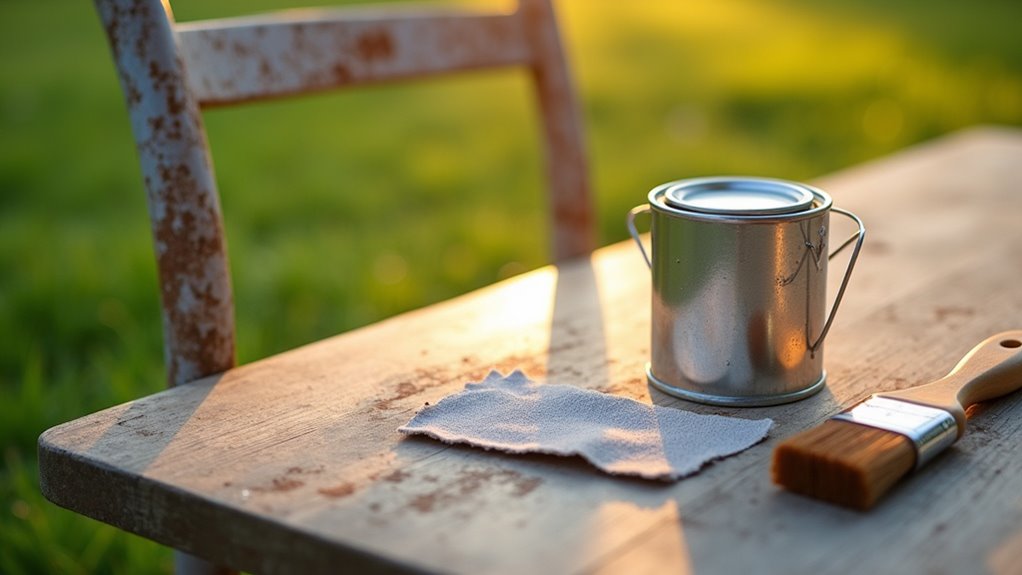
Let’s fix those scratches and rust on your patio chair!
Start by checking for damaged areas. Look for rust spots and scratches that need attention.
Next, gather your supplies. You’ll need sandpaper, rust remover, primer, and paint.
Sand down the rusty spots. This helps the paint stick better. Use rust remover to clean the area.
After cleaning, apply a coat of primer. This step protects the metal and ensures surfaces are prepared for priming.
Once the primer dries, paint your chair. Choose a color that brightens your patio.
Let the paint dry completely. Your chair is now ready for summer!
Enjoy your refreshed seating.
Inspect for Damage
Before starting repairs, inspect your patio chair for damage. This step helps you find problems early and keeps your chair in great shape.
Here’s what to check during your inspection:
- Look for cracks, chips, or peeling paint on all surfaces.
- Check metal parts for rust, especially at the joints.
- Watch for signs of water damage, like stains or warping. Regular maintenance can help prevent further deterioration.
Use a flashlight to see underneath the chair. Dampness often hides there. Additionally, be mindful of how humid summers can accelerate the wear and tear on your furniture materials.
Write down any scratches or rust you find. Keeping track of these issues now can prevent bigger problems later.
Grab your checklist and start inspecting! Happy fixing!
Repair and Repaint
Bring your patio chair back to life! Start by fixing any scratches. Use fine-grit sandpaper to smooth out nicks. Clean the area with soap and water. Let it dry completely. No one likes a sticky mess!
Choose touch-up paint that matches your chair’s color. Apply it according to the instructions. Buff it lightly for a seamless look.
Next, tackle rust. Use sandpaper or a wire brush to scrub away orange-brown spots. Apply rust converter to stabilize it. Then repaint with rust-resistant paint.
Your chair will be ready for sunny days ahead! Remember, a little maintenance goes a long way. Enjoy your refreshed chair!
Repainting Techniques
Repainting your patio chair is an easy way to give it a fresh look. With a few simple steps, you can make it look brand new.
Start by sanding off old paint and rust. This helps the new paint stick better.
Apply thin, even coats of spray paint. Thin coats reduce the chance of drips. Nobody wants a messy chair! Use a cross-hatch technique while spraying. This method helps you cover the chair evenly without streaks.
Before painting, clean the chair well. Dust and dirt can ruin your hard work.
For a fun twist, use tape to create a two-tone effect. Remember, taking time to prep makes a big difference. With these tips, your chair will be ready for summer fun!
Replacing and Tensioning Slings
Get your patio chair looking great by replacing the slings!
Start by measuring the dimensions carefully. Check for any uneven widths.
Once you have the new slings, install them carefully. Tension them just right. They should feel snug and comfy, like a warm hug!
Enjoy your refreshed patio chair!
Measuring Sling Dimensions
Measuring sling dimensions for your patio chair is important. A good fit means comfy seating! Follow these tips for accurate measurements:
- Measure the width from rail slot center to center.
- For odd shapes, take multiple length measurements along the rail contour.
- Check the fabric tension before you order.
Always measure with the sling attached. Don’t add extra for seams. Trust the chair frame! Round your measurements to the nearest 1/8 inch for precision.
If your chair seems a bit off, make sure everything is tight and in place before starting. Your patio chair will look great again!
Installing New Slings
You’ve got your sling dimensions ready. Now, let’s install those new slings!
First, flip your chair upside down. This is important for the process. Remove the old sling fabric and clean the rails well.
Next, take your new sling materials. Use soapy water to lubricate them. This helps with smooth insertion.
Feed the fabric into the top of the rail. Pull gently to avoid snags. Use pliers to make sure it’s snug and even. Leave a little excess spline sticking out.
If needed, loosen the bolts on the side rails. This helps with alignment.
Once everything looks good, tighten everything up. Now, you have a fresh new sling ready for lounging! Enjoy your new comfortable space!
Tensioning Techniques Explained
Getting the right tension on your patio chair sling is key for comfort and style. Here are some easy tips to help you achieve this:
- Use clamps to narrow the frame. This makes sling adjustment easier.
- Stretch the sling tightly. This boosts the fabric’s durability.
- Tighten bolts gradually. This creates even tension and avoids overstressing.
Start by clamping the frame. This helps the sling slide in smoothly.
Stretch the sling tight during installation. Make sure it aligns evenly.
Use spreader bars to keep the fabric taut. Tighten everything evenly.
Check the tension as you go. A well-tensioned sling looks great and supports your relaxation time.
Get that chair looking fabulous!
Reviving Cushions and Fabric
Reviving cushions and fabric can be a fun project. Start by checking for any damage. Use a soft brush and mild detergent mixed with water to clean dirt and stains. Remember to shake off loose debris before applying the cleaning solution for optimal results. This initial step helps to prevent dirt from settling deeper into the fabric. Rinse well and let them dry completely. Clean cushions help adhesives stick better. Additionally, make sure to remove loose dirt and debris before beginning the cleaning process for optimal results.
For any tears, cut a patch from similar fabric. Make the patch at least half an inch bigger than the tear. Use iron-on fusible tape for small rips. Test it on a hidden area first!
For a fresh look, wrap new fabric around your cushions. Pin it snugly and sew it up. Clean cushions regularly to keep them looking nice. Consider using fabric protection to guard against spills.
Got a ketchup stain? Act fast! Blot it with a clean cloth. With a bit of effort, you can make that stain disappear. You can do this!
Addressing Rust and Corrosion
Keeping your patio chairs rust-free is important. Here’s how to do it:
Use a wire brush or steel wool. These tools help remove rust easily. For small rust spots, try white vinegar or baking soda. Both work well and are safe to use.
After getting rid of the rust, apply a rust converter. This makes the surface smooth and ready for protection.
Preventing rust is just as important. Regularly clean your chairs to keep them looking good. Use protective coatings to stop rust from returning.
If you see rust, act fast. Use chemical rust treatments to fix the problem.
Safety matters. Always wear gloves and goggles when using chemicals. You’re not only saving your chairs but also making them look great.
Get to work and say goodbye to rust. Enjoy sunny afternoons on your beautiful patio!
Tightening and Replacing Hardware
Make your patio chairs strong and safe. Start by finding all screws, bolts, and fasteners. Some may hide under plugs or other parts. Use the right tools: screwdrivers, Allen wrenches, or a socket set. Follow this simple table for guidance:
| Step | Action | Tool Selection |
|---|---|---|
| 1. Locate Hardware | Find all screws and bolts | Screwdriver, Allen Wrench |
| 2. Tighten Fasteners | Tighten screws around the chair | Socket Set |
| 3. Inspect for Damage | Check for rust or wear | Visual Inspection |
| 4. Replace as Needed | Change damaged hardware | New Screws/Bolts |
| 5. Reinforce Joints | Use glue and clamps on joints | Wood Glue, Clamps |
Stay focused on each step. Tightening screws helps keep your chairs stable. Check for damage often. Replace any worn parts to ensure safety. Reinforce joints if needed. This simple process keeps your patio chairs in great shape. Enjoy your outdoor space with confidence!
Maintaining Patio Chairs
After tightening and replacing any loose parts on your patio chairs, it’s time to make them shine! Regular cleaning and protecting from the weather will help your chairs last longer. Here are some easy tips:
- Clean with mild soap and warm water. It’s gentle yet effective.
- Rinse with a hose at a low pressure. This removes dirt and soap quickly.
- Air-dry or towel-dry your chairs. This helps prevent mildew and eliminates odors from accumulating.
For weather protection, buy good quality covers. They protect your chairs from rain, sun, and frost when not in use.
Always store cushions indoors. This keeps them safe from mold and damage.
Routine maintenance is key. Just like brushing your teeth, it keeps everything fresh! Regular cleaning extends the lifespan of cushions and improves outdoor aesthetics.
Roll up your sleeves and care for those patio chairs. You can do it!
Frequently Asked Questions
What Tools Do I Need for Patio Chair Repairs?
For strong patio chair repairs, you need the right tools. A utility knife helps cut materials easily. A screwdriver is essential for tightening screws. Pliers grip and bend wires or small parts. A hammer can fix loose joints. Measuring tape ensures accurate cuts. Sandpaper smooths rough edges.
Having these tools makes repairs easier. You can fix chairs quickly and correctly. A good repair means your chairs last longer. Keep your patio looking nice with sturdy chairs. Grab your tools and start fixing today!
How Often Should I Inspect My Patio Chairs?
Imagine sipping lemonade on a sunny afternoon. You want your patio chairs to be safe and sturdy. To keep them in good shape, check them every 2-3 weeks. If you use them a lot, inspect them more often. This helps catch any problems early. Look for loose screws or cracks. Fixing small issues now can save you trouble later. Enjoy your outdoor time with peace of mind!
Can I Use Any Paint for Aluminum Frames?
Not all paint works for aluminum frames. Use acrylic or enamel paints. These types stick well to aluminum. They also resist weather and wear. Always read the label. Look for info on surface suitability. This step ensures the best results. Choose wisely for a lasting finish.
What Types of Fabric Are Best for Slings?
For slings, select strong fabrics like Phifertex or Sunbrella. These materials resist weather damage. They can handle UV rays and mildew. This makes them perfect for outdoor use. You won’t need to care for them as much. They last longer and stay looking good. Choose wisely for comfort and durability.
How Do I Prevent Future Wear on Patio Chairs?
To keep patio chairs fresh, use UV protection and clean them regularly. Cover chairs when not in use. Wipe down surfaces often to remove dirt and grime. Treat materials to protect against rain, sun, and wind. This simple care will help your chairs last longer and look great. Enjoy your outdoor space without worry!
Conclusion
Your patio chairs can look brand new again! Fix scratches, refresh fabrics, and deal with rust. You have the tools to make them comfy and bright. A little care goes a long way. Dive into this project! With your new skills, you’ll become a patio expert fast. Grab your tools and get started—your chairs want a makeover!