
How to Reupholster a Dining Room Chair
This post contains affiliate links. As an Amazon Associate, we earn from qualifying purchases.
Reupholstering a dining room chair is a rewarding project that can breathe new life into your furniture. To start, gather essential tools like an awl, screwdriver, and staple gun. First, flip the chair to unscrew and carefully remove the seat. Cut your foam and fabric to the appropriate size, layering them effectively. Use the staple gun to secure the fabric tightly. Finally, reassemble the chair and inspect for any wrinkles or loose spots—sagging is a no-go! For those interested in more detailed steps and tips, further explanations will follow in this article.
Essential Facts in 30 Seconds
- Gather tools: awl, screwdriver, and staple gun.
- Unscrew the seat from the chair by turning screws counterclockwise.
- Cut and layer upholstery materials such as foam and batting.
- Attach new fabric with a staple gun, avoiding wrinkles and sagging.
- Check for comfort and stability before using the chair.
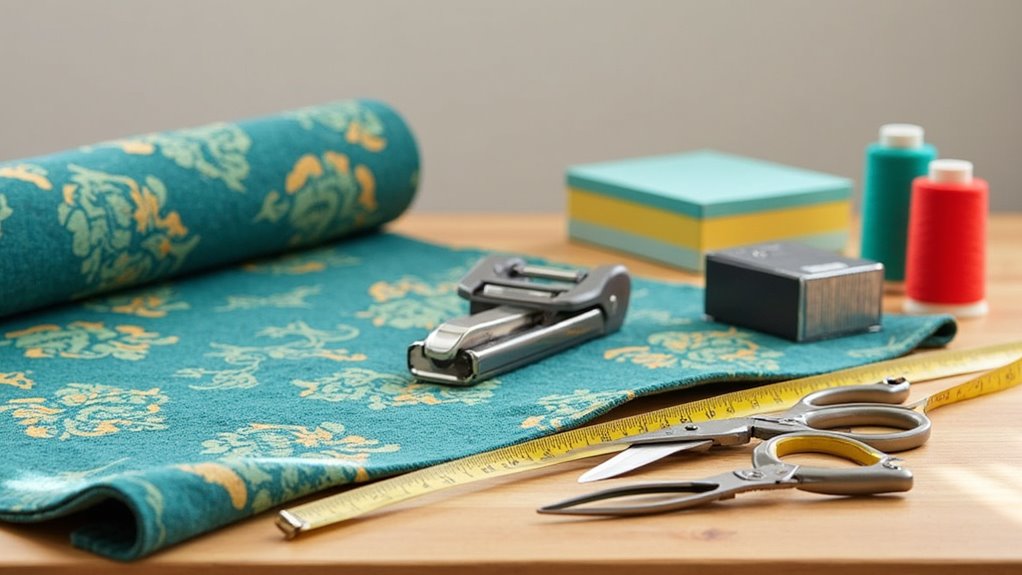
Tools Needed for Reupholstering
Ready to reupholster your dining room chair? You need some essential tools to get started.
Start with an awl. It helps pry out staples without damaging the wood. Needle-nose pliers are perfect for reaching tight corners. A screwdriver is important for unscrewing seat bases. Wire cutters will tackle stubborn staples. Use a seam ripper to remove old fabric seams easily. Remember that reupholstering enhances the dining chair appearance affordably. An essential tool to consider is a staple gun, which makes attaching new fabric much easier. Additionally, having a measuring tape on hand ensures you cut your new fabric accurately. Properly removing old upholstery is crucial for a smooth reupholstering process.
Keep your tools in good condition. Check them regularly for rust or damage. A dull blade won’t work well. Store your tools in a toolbox or on a pegboard. This way, you can find what you need quickly. A little organization makes a big difference.
With your tools ready, you can transform that old chair into something beautiful. Let’s get to work, one staple at a time!
Materials Necessary for the Project
Let’s get everything ready to reupholster your dining room chair! Gather your essential tools and materials. You need upholstery foam for comfort. Choose durable fabric that matches your style. Don’t forget to collect handy supplies to finish the job.
Grab a measuring tape for accurate sizes. Cut the fabric to fit the chair. Use a staple gun to attach the fabric tightly. Make sure the foam is placed correctly for maximum comfort. Remember, proper preparation for reupholstering is key to achieving a professional finish. Additionally, make sure to inspect the condition of the cushioning to ensure it’s suitable for use. Before starting, ensure you have a staple gun on hand, as it is essential for securing the new fabric. To enhance the comfort of your dining chair, consider using new foam padding that fits snugly on the seat.
Your chair will look fresh and new. No more ketchup stains! Enjoy your newly upholstered chair.
Essential Tools Overview
Before starting your reupholstering project, gather the right tools. This will make your work easier and more enjoyable.
Here’s a quick list to help you get started:
- Needle-nose pliers for removing stubborn staples.
- A staple gun to attach your fabric securely.
- Measuring tape to ensure everything fits perfectly.
- Fabric scissors for clean and neat cuts.
Additionally, having durable fabric on hand will enhance the longevity of your newly upholstered chairs. Using a staple gun can ensure that your fabric is secured tightly, preventing any sagging over time. Remember that properly securing fabric is crucial to avoid issues in the future.
Keep your tools in good shape with regular maintenance. Always prioritize safety. Common mistakes include not securing fabric properly, which can lead to sagging.
Remember, those staples can be sharp! With these tools ready, you’re set to transform that chair into something amazing.
Get ready to have fun with your project!
Required Upholstery Materials
Ready to reupholster your dining room chair? Having the right materials is key! Start with strong, easy-to-clean fabric. Choose something that lasts.
For padding, use high-density foam at least 1-2 inches thick. It makes sitting comfortable. Cotton batting smooths the surface. Dacron polyester batting adds a soft finish. Jute webbing is essential for support under the foam. Inspect foam padding for wear; replace if necessary to ensure comfort. Additionally, the condition of the foam padding is crucial for achieving the best results.
Don’t forget black cambric fabric. This acts as a dust cover. A staple gun will hold everything firmly in place. Use heavy-duty sewing thread for stitching.
With the right materials, you can transform your chair. Consider using a staple gun to ensure everything is held firmly in place, creating a durable finish. Create a cozy spot for family meals!
Recommended Fabric Types
Choosing the right fabric for your dining room chair is an exciting part of reupholstering. The right fabric can change the look of your chair completely. It can also change the feel of your dining space.
Here are some great fabric options:
- Velvet: This fabric feels luxurious and looks elegant. It’s also durable.
- Leather: A timeless choice. It’s easy to clean and gets better with age.
- Linen Blends: Light and breathable. This fabric adds a touch of sophistication.
- Performance Fabrics: These are super stain-resistant, perfect for busy homes.
When selecting fabric, consider the durability of upholstery fabric to ensure it withstands daily use.
With these options, you’ll create a fabulous chair.
Spilled ketchup? No problem! Cleaning it can be quick and easy. Enjoy your reupholstering journey!
Removing the Seat From the Chair
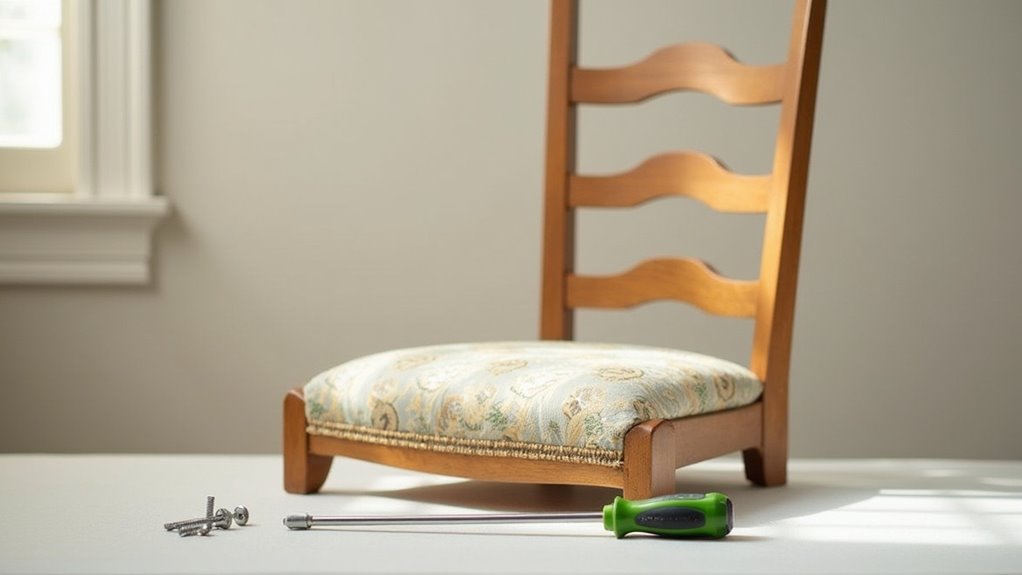
Let’s get that seat off your chair! This will help you start reupholstering.
First, take your screwdriver and any other tools you have. Flip the chair upside down. Look for the screws holding the seat in place.
Keep a small container nearby. This will store all the screws. Losing screws can be very annoying. It’s like stepping on a Lego—ouch!
Carefully remove each screw. Take your time to avoid damaging the chair. Once all the screws are out, lift the seat off. Inspect the foam condition once the seat is removed to ensure a comfortable seating experience. Now, you’re ready for the fun part—reupholstering! Additionally, inspect the padding for wear and replace if necessary to ensure a comfortable seating experience. This is also a good time to check for loose screws that may affect the chair’s stability.
Tools Required for Removal
Ready to tackle that dining room chair? Gather these tools for easy staple removal:
- Needle nose pliers grip and pull staples out with ease.
- Flathead screwdriver helps lift the seat fabric away.
- C.S. Osborne combination tool is a great staple puller.
- Rubber mallet taps on stubborn parts gently.
With these tools, you’ll remove the seat like a pro! Remember to inspect the foam padding for wear and replace it if necessary before reupholstering. Additionally, check for any damaged springs that may need replacement to ensure comfort and support. Inspecting the chair frame for any damage is also crucial to maintaining the chair’s integrity.
Choose your new upholstery fabric carefully for a fresh look.
Stubborn staples? Use a pry bar for extra leverage.
Let’s get that chair ready for a stylish makeover!
Unscrewing the Seat
Let’s dive into unscrewing that seat from the chair! First, turn the chair upside down.
Find the screws on the underside. Grab your screwdriver. Turn those screws counterclockwise. It’s simple!
Some screws might be tough. Use a bit more strength, but don’t go too hard. Once the screws are out, gently lift the seat off.
No screws? You might see compression fittings instead. Don’t worry! Just tap a block of wood next to them with a hammer. This will help loosen them.
Oops! If something breaks, it can be replaced later. Removing chair seats is an important step in ensuring a smooth recovery process.
With all fasteners gone, you’re ready for the next step. Let’s keep going!
Storing Hardware Safely
After unscrewing the seat from your dining chair, focus on storing the hardware safely. Keeping everything organized helps your reupholstery project go well.
Here are some tips for cleaning and storing your hardware:
- Clean all screws, bolts, and washers. No grease should remain.
- Group hardware by chair and place it in small labeled bags.
- Store these bags in a cool, dry place. Keep them away from heat and moisture.
- Use a magnetic tray to keep everything organized while you work.
Following these steps makes the process easier and keeps your hardware in great shape.
Cutting and Layering Upholstery Materials
Cutting and layering upholstery materials is easier than it sounds. Start with good tools. Use fabric scissors or a rotary cutter. Ordinary scissors can create jagged edges. Measure your seat and add a few extra inches for wrapping. Mark your fabric with chalk for a perfect cut.
Next, layer your materials. Begin with a plywood base. Add high-density foam for comfort. Cut the foam to fit your seat. Cover it with polyester batting, making it slightly larger than the foam.
Stack the layers neatly. Smooth out any bumps or wrinkles. Avoid extra batting in corners to prevent lumps.
Now you’re ready for the fun part! Choose fresh fabric to give your chair a beautiful makeover. Celebrate your progress and enjoy your new creation!
Stapling the New Fabric in Place
Time to give your dining room chair a fresh look! Stapling new fabric is fun and important. It keeps the fabric tight and sharp.
Here are some easy tips to help you:
- Start at the center of the top edge. Staple to anchor the fabric.
- Pull the fabric tight as you staple the opposite edge. Keep that tension!
- Work down each side. Staple every few inches for security.
- Leave corners unstapled until the edges are secure.
Follow these steps for a great finish!
Reassembling the Chair
You’ve dressed up your dining room chair in fresh fabric. Now, it’s time to put it back together. Think of it as solving a puzzle!
Start by cleaning the chair frame. Make sure it’s dry. Check for any loose joints. Use wood glue or screws to make the chair strong.
Next, align the seat with the frame. Match the screw holes carefully. Use a screwdriver to put the screws back in. Tighten them well, but don’t overdo it. No one likes a stripped screw! If you have bolts, add washers to protect the wood.
After that, gently rock the seat to see if it’s stable. Reattach any armrests, backrests, or decorative pieces you removed.
Finally, inspect everything. Tighten any loose parts and wipe away dust. You’re almost done! Your chair is ready to use.
Final Touches and Quality Check
Before you relax in your newly upholstered dining room chair, ensure everything looks great. Follow these steps for a final quality check:
- Look for wrinkles or loose spots in the fabric. It should feel smooth and tight.
- Check the staples. They need to hold the fabric securely. No sagging allowed!
- Carefully trim any extra fabric. Avoid surprises from unraveling.
- Gently iron or steam to remove creases.
Secure fabric edges to prevent fraying.
Test the chair for comfort and stability. If it feels good, give yourself a high-five! You did a fantastic job.
Spilled ketchup? No worries! Use fabric protection to tackle that stain.
Frequently Asked Questions
How Much Fabric Do I Need for Multiple Chairs?
To find out how much fabric you need for multiple chairs, start with chair measurements. Measure the length and width of each seat. Don’t forget to add extra fabric for seams.
Think about patterns on the fabric too. Patterns may require more fabric to match.
For multiple chairs, multiply the fabric needed for one chair by the total number of chairs. This way, you’ll have enough for all of them.
Always buy a little extra fabric. This helps cover mistakes or changes.
Keep these tips in mind. You’ll have the right amount of fabric for your chairs!
Can I Use Regular Fabric Instead of Upholstery-Weight?
Regular fabric can be tempting for your project. It might seem like a good choice, but it often lacks durability. Upholstery fabric is specifically designed to handle wear and tear. It helps your furniture last longer and look great.
Using regular fabric may be fine for light use. For example, a chair that won’t be used much could work. But for furniture that sees daily use, upholstery fabric is best. It is thicker and stronger, making it perfect for high-traffic areas.
How Do I Choose the Right Foam Thickness?
Choosing the right foam thickness is important for comfort and support. A good thickness is between 2 to 3 inches. This range provides the right balance for your chair. It keeps you comfortable while maintaining the chair’s style. Thicker foam can feel cozy, but it might make the chair look bulky. On the other hand, thinner foam may not give enough support. Consider your personal comfort and the chair’s design. Finding the right foam thickness makes a big difference in how you feel while sitting.
What Is the Best Way to Clean Upholstery Fabric?
Cleaning upholstery can seem hard, but it’s easy with the right steps. First, always check the fabric code. This code tells you how to clean it properly. Different fabrics need different care.
Start by vacuuming your upholstery. This removes dust and dirt. Use a soft brush attachment to avoid damage. Next, test any cleaner on a small, hidden area first. This helps you see if it will harm the fabric.
Choose gentle cleaning solutions. Avoid harsh chemicals that can ruin your upholstery. For stains, dab with a soft cloth. Blot, don’t rub, to prevent spreading the stain.
For deeper cleaning, consider professional services. They have equipment and solutions that can refresh your furniture. Regular care keeps your upholstery looking new and fresh.
How Can I Fix a Wobbly Chair After Reupholstering?
You just finished reupholstering a chair, but it wobbles. This can be frustrating. Fixing it is simple. Start by checking the chair legs. Look for any loose screws. Tighten them until they feel secure. Next, examine the joints. Make sure they fit tightly together. If a leg is uneven, add a small piece of felt or wood to balance it. Test the chair after making these adjustments. It should feel stable now. Enjoy your newly upholstered chair!
Conclusion
You’ve turned that old chair into a stylish piece. Friends will be impressed at dinner. It’s amazing how a little effort can change furniture. Mistakes can happen, like accidentally stapling your finger instead of the fabric. Ouch! Stay positive and enjoy the journey. What project will you tackle next? Go for it with confidence! You can do this!