
How to Recover a Chair Seat
This post contains affiliate links. As an Amazon Associate, we earn from qualifying purchases.
To recover a chair seat, begin by inspecting it for rips or stains and gather essential tools such as a staple gun and measuring tape. This guide will provide you with step-by-step instructions for a successful chair makeover.
Start by flipping the chair over and unscrewing the seat to remove the old upholstery—remember, patience is crucial during this process! Ensure any loose joints are fixed with screws or brackets for added stability. Next, add comfortable foam and your chosen fabric, securing everything tightly. When reattaching the seat, tighten the screws diagonally for a secure fit. Follow these steps, and you’ll soon master the art of chair recovering!
Essential Facts in 30 Seconds
- Assess the chair for stability and accessibility before starting.
- Carefully remove old upholstery and check foam padding for wear.
- Repair the chair frame by tightening joints and adding support brackets.
- Cut new high-density foam and durable fabric, securing them with a staple gun.
- Reinstall the seat, ensuring alignment and tightening screws diagonally for stability.
Assessing the Seat Condition
Assessing your seat condition is important for comfort and safety. Start by checking the upholstery. Look for rips, stains, or sagging. Spilled ketchup? Time to clean that up!
Next, assess how the seat supports your posture. Check for pelvic obliquity, where one side sits higher. Balance is key to staying comfortable, as good posture facilitates effective functional performance and is energy efficient. Additionally, ensure that the chair’s structure is stable and secure, as this can greatly affect your sitting experience. A broken leg can undermine the chair’s stability and should be repaired promptly. Pay attention to the chair structure to ensure it can support your weight effectively.
Examine chair features, too. Armrest height and seat depth matter for alignment. If you feel discomfort while sitting, adjust the setup.
Also, think about how you get in and out of the chair. It should feel safe and easy. Take time to give your chair the care it needs. Your back will appreciate it!
Tools and Materials Required
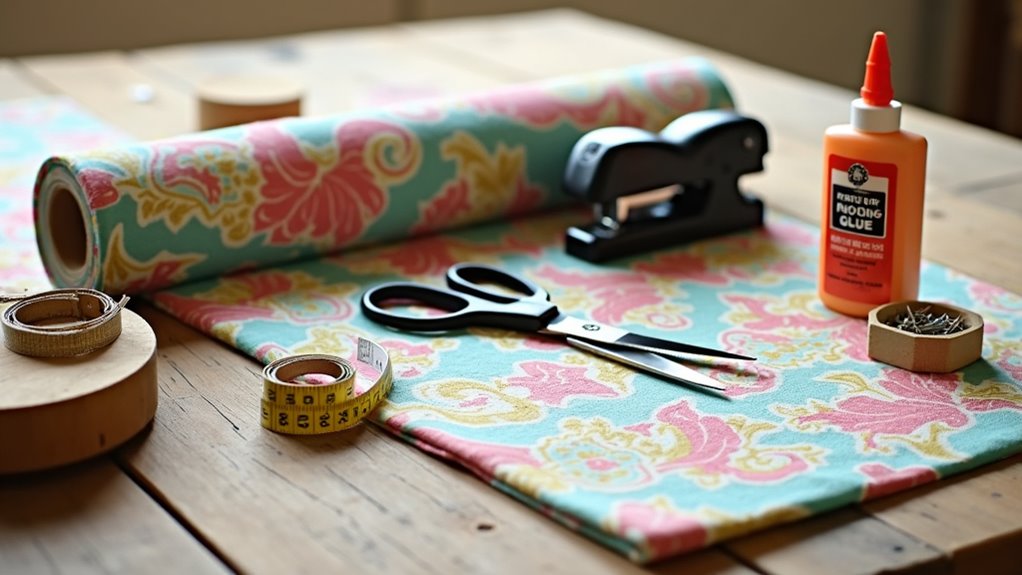
Get ready for your chair recovery project!
Gather your essential tools. A heavy-duty stapler will help secure the new fabric. A staple remover is handy for those tricky moments. Regularly sharpen your shears to maintain cutting efficiency and ensure clean edges on your upholstery fabric. Consider adding padding to enhance comfort and replace cushioning if it is worn out. Additionally, selecting durable fabric will ensure your chair withstands daily use. The stapling process is crucial, as it helps keep the fabric taut and secure. With the right tools, your chair will shine like new!
Essential Basic Tools
Ready to recover a chair seat? Having the right tools makes the job easier! Start with a power drill and screwdrivers to handle screws. A measuring tape is essential for precise cuts. A hammer will help you secure tacks. Remember to consider repairing a chair seat as a rewarding DIY project that can enhance your skills. Additionally, understanding how to attach new fabric properly will ensure a professional finish. Using a staple gun is also vital for securing fabric effectively to the chair. When you remove the old seat, be careful to avoid damaging the wood of the chair frame.
Here’s a quick list of important tools:
| Tool Type | Purpose | Safety Tip |
|---|---|---|
| Power drill | Drilling holes and driving screws | Always wear safety goggles! |
| Staple gun | Securing fabric and webbing | Keep fingers clear of the tip! |
| Clamps | Holding pieces while drying | Make sure it’s stable before release! |
These tools will help you achieve great results. Happy crafting!
Specialty Tools Overview
Get ready to dive into specialty tools for chair seat recovery! A pneumatic stapler is a must-have. It cuts down on effort and increases precision. Pair it with a compressor for steady power. You’ll feel like a pro with this setup! Additionally, a staple gun and staples are essential for securing your new fabric efficiently.
Upholstery shears are another essential tool. The Kretzer 10″ shears work great for cutting fabric smoothly. When you remove old upholstery, take care to avoid damaging foam or wood during the process. Curved and button needles help with those hard-to-reach spots. Don’t forget upholstery tacks to hold everything securely in place. With the right tools, including a staple gun, you can handle any chair seat recovery project easily. Roll up those sleeves. Your chair is about to get an amazing makeover!
Removing Old Upholstery
Tackling old upholstery is a rewarding project. Start by flipping your chair upside down. Unscrew the seat from the frame. Work from the bottom up, removing parts in the reverse order they were attached. Wear gloves to protect your hands from sharp nails and staples.
Use a staple remover or a flathead screwdriver to pull out the staples. It’s okay if you tear the fabric a little. Just make sure fabric patterns are still visible for reference later. As you peel away layers like the dust cover and upholstery fabric, be patient. This might take time. Repair and padding is essential for ensuring a solid foundation before you proceed, as it helps replace worn padding and maintain comfort. Additionally, inspect foam padding for wear and consider replacing worn foam for added comfort.
For chairs with cushions, unscrew or unclip them to remove. Check the padding underneath. Replace any worn foam to keep your chair comfy.
Repairing or Reinforcing the Frame
Before fixing your chair, check the joints. Are they strong? Look for loose joints or cracks.
Adding support brackets can help. This small fix keeps your chair sturdy. Additionally, tightening screws can further enhance the stability of the chair frame. When reinforcing the frame, it’s essential to inspect screws to ensure they are secure and not stripped. Regular inspections can help identify common issues before they become major problems.
A well-reinforced chair feels solid. No more wobbles means comfy seating for you!
Assessing Joint Integrity
Assessing joint integrity in your chair frame is important. Start with a careful inspection. Look for looseness, cracks, or missing fasteners. A quick visual check can show a lot.
Next, test the chair. Sit down and wiggle a bit. This simulates normal use. Any give means there’s a problem. Additionally, repairing cracked legs can help restore strength to the chair’s structure.
For repairs, use sturdy dowels or strong mortise and tenon joints. Strong joints keep your chair lasting longer. Additionally, tightening loose joints can enhance stability and prolong the chair’s lifespan.
If you bump the chair while checking, just laugh. Call it a “friendly nudge!”
Installing Support Brackets
Installing support brackets can greatly strengthen your chair frame. Follow these simple steps for the best results:
- Find the right spots on your chair frame for the brackets.
- Clean the area well to help the brackets stick.
- Mark the spots for the brackets to ensure even weight support.
- Gather your tools like screwdrivers and wrenches. They’ll help you.
- Attach the brackets securely. Make sure they’re tight and facing the right way.
With these steps, your chair will be much sturdier!
Adding New Padding and Upholstery
Adding new padding and upholstery gives your chair a fresh look. It’s like a makeover!
Start by choosing the right padding. High-density foam works best. It makes your seat comfy and lasts long. Add batting on top for a smooth feel.
Next, pick your fabric. Choose something strong and easy to clean. Synthetic microfiber or olefin are great options. They hold up well in busy homes. Natural fibers like cotton and linen are nice too, but they need more care.
Before cutting your fabric, wash it first. This helps prevent surprises later. Leave extra inches around the edges for stapling.
Secure your padding with glue and smooth it out. Then, lay your fabric over it. Use a staple gun to attach it.
With these steps, your chair will look amazing in no time! No special skills needed.
Finalizing and Reinstalling the Seat
Now that your chair has fresh upholstery and padding, it’s time to put everything back together. Start by placing the newly upholstered seat onto the chair frame. Make sure it lines up with the holes for screws or bolts. Use your screwdriver or drill to reattach the seat. Apply even pressure to avoid any wobbling.
Follow these important steps:
- Tighten screws diagonally for even tension.
- Keep the upholstery smooth and wrinkle-free.
- Reinstall any decorative hardware carefully.
- Check that all moving parts work smoothly.
- Inspect for stability and comfort.
With patience, your chair will be ready to use!
And remember, if you spill something, your new upholstery will help keep it looking fresh!
Frequently Asked Questions
How Do I Choose the Right Fabric for My Chair?
Choosing fabric for your chair is all about durability and color. Look for strong materials that can handle wear and tear. They should also match your room’s style. Bright colors can add fun, while neutral tones offer calm. Think about how the fabric feels too. Soft fabrics are cozy, while smooth ones are easy to clean. Remember, a good choice makes your chair stylish and long-lasting. Keep these tips in mind for the perfect fabric!
Can I Use Spray Adhesive for Upholstery Projects?
You can definitely use spray adhesive for upholstery projects. It’s easy to apply and bonds quickly. This makes it great for various fabrics. Spray adhesive works well for attaching fabric to cushions, chairs, and more.
Always remember to be safe. Make sure the area is well-ventilated. Wear gloves and a mask to protect yourself. It’s also smart to test the adhesive on a small area first. This way, you can check how the fabric reacts.
Spray adhesive is a handy tool for any upholstery project. With the right care, it can help you achieve great results. Enjoy your crafting!
What Are the Signs That a Chair Is Worth Recovering?
Signs that a chair needs recovering are easy to spot. Look for visible damage, faded fabric, or worn edges. Check the overall condition closely. Sentimental value can also matter. High-quality materials make a chair worth the effort. Consider how much you love the chair. Is it comfortable? Does it fit your space? These factors help in deciding if you should recover it.
How Can I Remove Stubborn Staples From the Frame?
Removing stubborn staples can be tricky. Use a staple remover or pliers for the best results. First, grip the staple tightly. Apply gentle pressure to loosen it. Then, twist the staple out carefully.
If the staple resists, try wiggling it side to side. This can help break the grip. For really tough staples, you might need to use a flathead screwdriver. Slide it under the staple to pry it up.
Be patient. It may take a few tries. Once you remove the staple, check for any leftover pieces. Clear those out to prevent future headaches. With these tips, you’ll tackle those staples like a pro!
Is It Necessary to Replace Padding When Recovering?
Replacing padding isn’t always needed. It depends on the condition of the padding and the types used. Old or damaged padding should be replaced for comfort and support. New padding can also improve the look of your furniture. Consider your goals. Are you looking for better comfort? New padding is a smart choice. Want a fresh look? New padding helps with that too. Always check the padding before starting recovery. Good padding makes a big difference in how your furniture feels and looks.
Conclusion
Your chair seat is now transformed! With some effort and creativity, you changed a worn-out seat into a comfy throne. Each step was like adding a brushstroke to a beautiful painting. Take a moment to admire your work. Enjoy your new chair! And if a spill happens, see it as a fun new adventure.