
How to Reupholster a Dining Room Chair Seat
This post contains affiliate links. As an Amazon Associate, we earn from qualifying purchases.
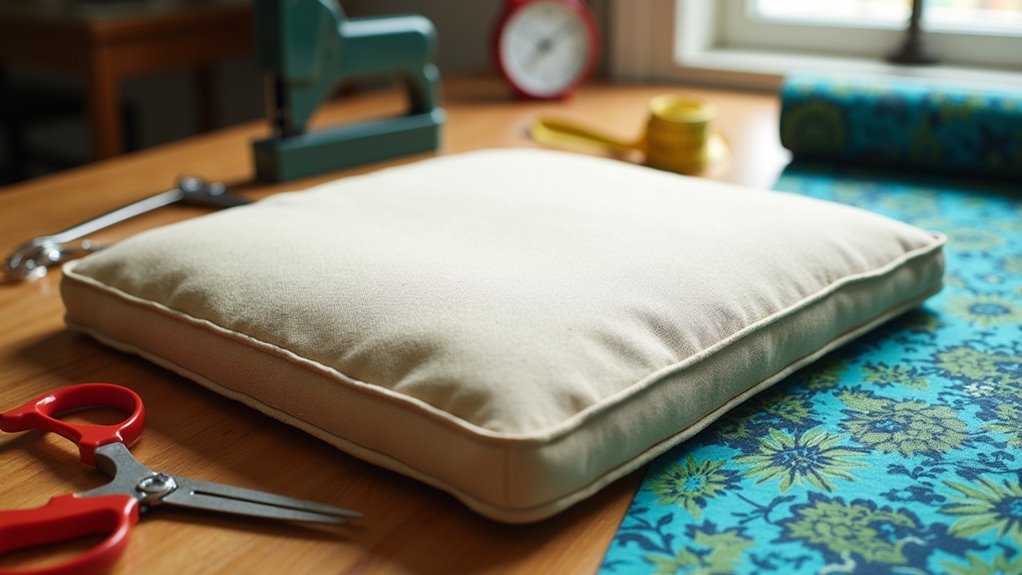
Reupholstering a dining room chair seat is a straightforward process that can breathe new life into your furniture. Begin by removing the seat with a screwdriver and pulling out old staples using pliers—be cautious of splinters! Next, cut new fabric, allowing extra inches for wrapping, and place it over fresh foam. Pull the fabric tight as you staple it in place, then reinstall the seat with screws. Finally, trim any excess fabric and add a stylish dust cover. For those interested in more detailed tips and tricks to enhance your chairs, stay tuned!
Essential Facts in 30 Seconds
- Detach the seat from the chair frame using a flathead screwdriver and pliers to remove staples.
- Clean the wooden base and replace old padding and foam for enhanced comfort.
- Measure and cut new upholstery fabric, adding extra inches for edge wrapping.
- Staple the fabric tightly around the seat, ensuring neat corner folds and extra staples for security.
- Reattach the seat to the frame with original screws and finish with a dust cover for stability.
Materials and Tools Needed
Ready to reupholster your dining room chair seat? Let’s turn this into a fun DIY project!
Start by gathering your tools. You need an awl for making small adjustments. Pliers will help you remove staples easily. A staple gun is essential for attaching the new fabric. Use a screwdriver set to detach the seat from the frame. Don’t forget sharp scissors for cutting the upholstery fabric.
Next, choose your upholstery fabric. Cotton blends, polyester, and faux suede are great options. Pick the one that fits your style and lasts long. Reupholstering enhances the aesthetic appeal of your dining chairs, making them look fresh and inviting. It’s important to select a fabric that is durable for daily use to ensure longevity. Durable fabric will withstand the wear and tear of everyday meals and gatherings. You may also want to consider foam padding for added comfort and support during meals.
For comfort, use high-density foam for a cozy seat. Dacron polyester batting gives a soft finish. For extra support, add jute webbing. This will make your chair strong and ready for use.
Get excited! Your dining room chair will look amazing after reupholstering.
Preparing the Old Seat
Let’s jump into reupholstering your dining room chair seat. Start by using a flathead screwdriver to detach the seat from the chair frame. Be gentle while removing it.
Next, use pliers to pull out those pesky staples. Removing them is important. Leftover staples can make your work harder later. If the seat is tough to remove, a pry bar can help.
Once the seat is off, take off the old fabric and throw it away. Check the wooden base for any damage. Inspecting the wooden base is crucial to ensure it’s sturdy enough to support the new upholstery. Clean it well to remove glue and dirt. If you see rough spots, sand them with 60-grit sandpaper. This step is important! Reupholstering is a sustainable option that prevents waste by recycling fabric and materials from old furniture. Additionally, ensure that you have a clean, flat workspace for the project to avoid any complications. Don’t forget to inspect the condition of the cushioning to determine if it needs replacement.
Finally, take off the old padding and foam. Make sure the surface is smooth and ready for new cushioning. Great job so far—keep going!
Cutting and Prepping New Materials
Get ready to cut your new materials with these simple steps!
First, measure your seat dimensions carefully. Add 3 to 4 inches for the fabric wrap. Select upholstery-grade fabric. It lasts longer and is easier to clean. Upholstery-grade fabric is designed to withstand wear and tear, ensuring your chairs maintain their appearance over time.
Pick the right foam density. This affects comfort based on how often you use the chairs. Remember that fabric durability is measured by double rubs, so choose accordingly based on your usage. Foam padding is essential for enhancing comfort and appearance. Additionally, ensure that the foam is cut to size for the seat to provide proper support.
Iron your fabric to remove wrinkles. This helps keep the patterns aligned. Once you finish prepping, lay your fabric flat, wrong side up.
Use heavy-duty scissors or a rotary cutter. These tools give you clean cuts. Always double-check measurements before cutting.
Replacing foam? A serrated knife works great for that.
Precision is key. This helps avoid gaps or bulges. Now, you’re set to move on to the next steps. You’ve got this!
Attaching New Upholstery
Your materials are ready. Now, it’s time to attach the new upholstery!
Start by laying your fabric down, face side down. Layer it correctly: batting first, then foam. Smooth out any bumps. Think of it like giving your chair a little massage. Measuring cushion dimensions before cutting your fabric will ensure a perfect fit. Remember to choose durable fabric that aligns with your personal style and lifestyle needs.
While stapling, pull the fabric tight, but not too tight. Imagine giving your chair a cozy hug. Remember to add extra staples for security to ensure durability.
Tackling tricky corners can be challenging, but we’ll handle that together! Take your time and work carefully for the best results. Enjoy the process!
Stapling Technique Essentials
Getting your stapling technique right makes your dining room chair look fresh and polished. Here are some important tips:
- Use the right staple types. This ensures a strong hold without hurting your fabric.
- A pneumatic stapler speeds up the job. A manual one works well for smaller tasks.
- Set the correct pressure on pneumatic tools to avoid problems. Proper stapling technique is essential for achieving a professional finish.
- Practice on scrap wood first. Get comfortable with your stapler. This will help you understand the attachment method for the fabric.
Start stapling from the center of each side. Move outward as you go. Keep the fabric tight but straight. Check for even coverage. Remember to secure every staple and seam, ensuring your upholstery lasts longer.
With these tips, you’ll staple like a pro in no time!
Corner Folding Tips
Tackling tricky corners while reupholstering is all about finesse! Start with 1.5 to 3 inches of extra fabric around the edges.
Center the seat on the fabric and flip it over. Pull the fabric tight over flat areas to avoid wrinkles.
For rounded corners, staple at the midpoint and make small pleats. This helps manage bulk. Proper fabric application is key to achieving a smooth finish. Remember, reupholstering an office chair can be a great way to practice your skills.
For sharp corners, fold back neatly, trim the excess, and use a 45-degree fold for a clean edge.
Corner folding needs patience. Take your time and keep the fabric taut. Remember to attach the new fabric securely to ensure a polished finish. Soon, you’ll have corners that look fantastic! Happy upholstering!
Testing Comfort Level
After tackling those tricky corners, check how your newly upholstered chair feels. Comfort is key!
Start by pressing down like you’re sitting normally. Feel the cushion firmness. Sit down multiple times. Look for any pressure points or fabric pulling.
Use a pressure sensor pad for exact readings if you have one. Ensure the fabric is tight and smooth—no wrinkles allowed! Proper lumbar support can also significantly enhance comfort, especially during long periods of sitting.
This testing shows if you need extra padding or a softer fabric. The goal is a comfy chair that invites you to sit and stay awhile. Consider adding lumbar support cushions to promote good posture and reduce strain during long hours of sitting.
Reinstalling the Seat
Now that your seat looks great, it’s time to reinstall it.
First, align the seat with the chair frame. Ensure everything fits tightly. No gaps should be present.
Once it’s in place, use the original screws to secure it.
After that, test the seat for stability. It shouldn’t wobble. If it does, tighten the screws until it feels sturdy.
Enjoy your newly reinstalled seat!
Align With Chair Frame
Get that seat back on the chair! Follow these simple steps for proper seat alignment and to make sure it fits the frame well.
First, place the seat base flat on the chair frame. Check that it sits evenly. Next, line up the holes on the seat with those on the frame. Apply gentle pressure to fit the cushion snugly. Avoid using too much force to prevent damage.
Use clamps to hold the seat in place. This keeps it steady while you work. Make sure nothing interferes with the seat back or legs.
With everything aligned, your chair will soon be ready for the dinner table. Great job on your hard work!
Secure With Original Screws
Once the seat is aligned, secure it with the original screws.
Use a screwdriver that fits the screws, either Phillips or flathead. Insert each screw into its hole and turn it clockwise. Apply steady pressure, but don’t tighten too hard. You could crack the wood!
Stop tightening when you feel resistance. Tighten slowly, step by step. Check the holes to make sure no fabric blocks the screws.
After securing everything, wiggle the seat gently. This checks that it’s firmly in place. Great job!
Check for Stability
Before attaching the seat back to your chair, ensure everything is stable and ready. Checking stability is key to keeping your chair durable.
Follow these steps during your inspection:
- Examine joints for any looseness or cracks in the wood.
- Look for warped areas where the seat connects to the frame.
- Check for signs of wood rot or insect damage.
- Test the chair for wobbling or uneven legs.
After confirming everything is solid, reinstall the seat. A sturdy chair equals a happy backside!
Fix any issues before moving on. Your chair should be as stable as a ninja on a tightrope—no surprises!
Finishing Touches
Finish your reupholstering project with care. Those last touches can truly enhance your chair’s look!
Start by cutting a piece of black cambric for a dust cover. Staple it over the raw edges to hide seams. This gives a neat finish and protects your work from dust and damage.
Next, fold the fabric diagonally at the corners. Staple them down tightly to avoid any bunching. Trim any extra fabric, leaving a half-inch seam allowance for strength.
After that, reattach the seat with the original screws. Be careful not to overtighten! A protective spray like Scotchgard helps shield your fabric from spills and stains.
For a crisp look, gently iron out any wrinkles. With these steps, your chair will look great. You’ll feel proud of your reupholstery skills!
Frequently Asked Questions
How Do I Choose the Right Upholstery Fabric?
Choosing the right upholstery fabric is important. Think about how long the fabric will last. Strong materials resist wear and tear. Look for fabrics like canvas or leather for durability.
Color also matters. Pick shades that match your home decor. This helps create a welcoming atmosphere. Neutral colors offer flexibility. Bold colors can add excitement.
Texture plays a role too. Soft fabrics can make a space feel cozy. Smooth fabrics can look elegant.
Remember to consider cleanability. Some fabrics are easier to clean than others. Choose according to your lifestyle. Pets or children? Go for stain-resistant options.
Take your time. Compare different fabrics. Feel them and see how they look in your space. This will help you make the best choice.
Can I Reupholster Without Removing the Old Fabric?
Reupholstering gives your chair a fresh look. You can put new fabric over old fabric, but only if it’s smooth and clean. Check the layers of fabric first. Make sure the new material is thick enough to cover the old one. This way, your chair will look great and feel comfortable. Enjoy your newly upholstered chair!
What Type of Foam Is Best for Dining Chairs?
High-density foam is the best choice for dining chairs. It offers great durability and support. This foam lasts longer than other types. While memory foam feels nice, it might not be firm enough for daily use. You want your dining chairs to be comfortable and supportive. High-density foam gives you both. Enjoy lasting comfort at the dinner table.
How Can I Clean My Upholstery Fabric?
Cleaning upholstery fabric gives your favorite furniture a fresh look. Start by vacuuming the fabric well. This removes dust and dirt. Next, spot clean any stains. Use a gentle detergent and a soft cloth. Always test the cleaner on a hidden area first. This helps keep the fabric safe.
For tough stains, you might need a little more effort. Blot, don’t rub, the stain. Rubbing can spread it or damage the fabric. After cleaning, let it air dry. Avoid direct sunlight to prevent fading. Regular cleaning keeps your upholstery looking new and vibrant. Enjoy your refreshed furniture!
Is It Necessary to Use Dacron Batting?
Dacron batting offers great benefits, but it isn’t a must-have. It adds softness and gives your project a neat finish. You can also use thicker foam for extra support. Many people find foam to be a cost-effective choice. Choose what feels right for your needs.
Conclusion
Reupholstering your dining room chair seat is easier than it seems. It might look tricky at first, but you can do it! Think of it as giving your chair a fun makeover. Gather your tools and choose your favorite fabric. This project can bring new life to your chairs. It’s a great way to show off your creativity. You’ll feel proud of your skills when you finish. Get started today and watch your chairs shine again!