
How to Reupholster a Wingback Chair
This post contains affiliate links. As an Amazon Associate, we earn from qualifying purchases.
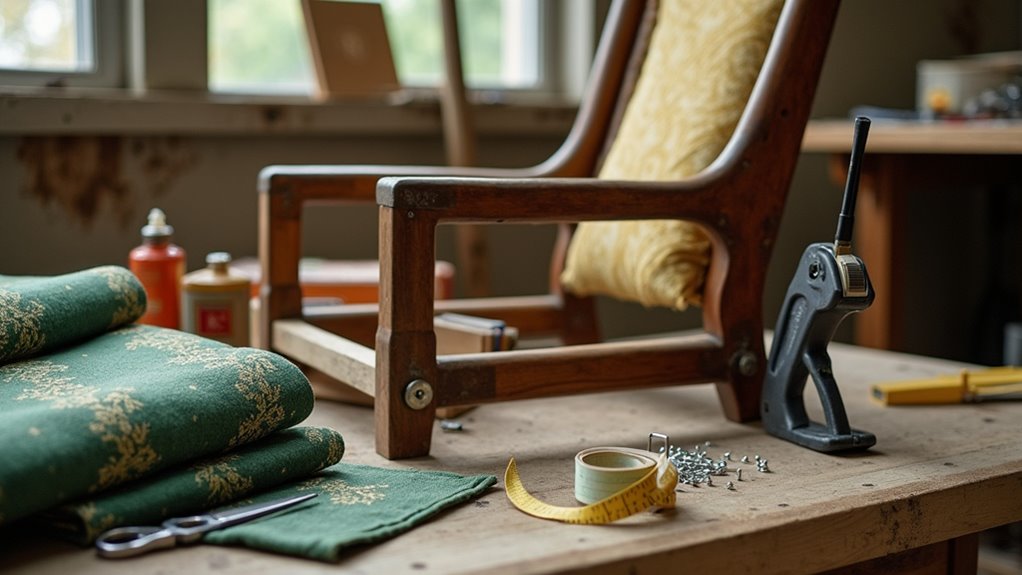
Reupholstering a wingback chair involves a few essential steps: gather your tools, remove the old fabric, and apply the new fabric securely. Start by collecting a screwdriver, pliers, and a staple remover. Take off the cushions and snap some reference photos. After reinforcing the frame for added support, measure your new fabric carefully to ensure pattern alignment. Remove the old fabric, tuck in the new, and staple it tightly. Finish off with any decorative accents like tack strips and give your chair a thorough cleaning. For those interested in more detailed guidance and handy tips, further explanations will follow.
Essential Facts in 30 Seconds
- Gather tools: screwdriver, pliers, staple remover.
- Carefully remove old fabric and check for damage.
- Use old fabric as a template for new upholstery.
- Cut and measure new fabric, aligning patterns correctly.
- Securely staple new fabric for a tight fit.
- Consider adding cushioning for extra comfort.
- Inspect for loose screws, clean the chair, and add decorative accents before reassembly.
Preparation and Disassembly
Reupholstering a wingback chair starts with preparation and disassembly. This step is like your DIY warm-up. Grab your tools and get organized. You’ll need a screwdriver, pliers, and a staple remover. Lay them out where you can see them. Choose a clean workspace to keep track of all parts. Snap photos of the chair from different angles. These will help during reassembly.
Next, remove any cushions and check the chair for damage. Take note of loose screws or staples. As you peel away the old fabric, keep it intact. It will serve as a template for your new fabric. Inspect and replace padding if necessary to ensure your chair is comfortable and well-supported. Additionally, remove existing upholstery from the back using a screwdriver to prepare for the new fabric. Inspect foam for damage and replace it if necessary to maintain the chair’s comfort. Properly securing the new fabric with a staple gun will ensure a polished finish.
Label and store removed hardware separately. This prevents losing any pieces later. Remember, a little mess is part of the fun. Just no ketchup stains allowed!
Frame Reinforcement and Support
Give your wingback chair the support it needs. Start by reinforcing the frame. This will improve stability and ensure it stays strong. Use pocket screws on both wing attachments for added security. Additionally, using wood pieces with notches and curves will enhance the structural integrity of your chair. Regularly checking for loose screws or bolts can also help maintain the chair’s strength. Inspecting the feet of the chair for wear is also essential for overall stability. Remember, maintaining chair components can prolong its lifespan and functionality.
Next, attach a front support piece to the legs using wood glue and screws. This will help keep the seat stable. For even more strength, add corner braces at the seat frame corners.
Check this handy table for steps:
| Step | Material | Purpose |
|---|---|---|
| 1. Wing Attachments | Pocket screws | Increase security |
| 2. Front Support Piece | Wood glue, screws | Improve seat stability |
| 3. Corner Braces | 45-degree wood | Reinforce corners |
| 4. Curved Base Support | 3×1 wood | Lateral support |
| 5. Spacer Blocks | Wood screws | Angle support for wings |
Now, secure those connections. Your chair will be ready to impress!
Creating and Using Fabric Patterns
Your wingback chair is ready for a stylish update with fresh fabric patterns! Start by picking your fabric. Floral patterns can brighten your space. Stripes add excitement. Solid colors offer a classic look. Keep in mind that upholstery fabric options include a variety of materials and patterns to suit your aesthetic preferences. Choosing a durable upholstery fabric will ensure your chair stands the test of time.
Once you choose your fabric, focus on pattern alignment. Make sure patterns match on the wings, back, and seat. A butterfly wing should look perfect, not crooked. Additionally, consider using durable fabric suitable for kitchen use if your chair is frequently used in a dining setting. It’s essential to select upholstery fabric that can withstand daily use and cleaning.
Mark the original button holes and lay out the fabric carefully. For larger patterns like buffalo check, measure twice to avoid mismatches.
Enjoy this creative process! You’re turning a chair into a work of art. Grab your scissors and let’s make magic happen.
Uh-oh, spilled ketchup? No worries! Let’s make that stain disappear like a ninja!
Upholstering the Seat, Arms, and Wings
Transforming your wingback chair is easy! Start by taking off the old fabric. Check for any hidden damage underneath. Make sure the webbing and springs are strong. A solid seat feels much better! Additionally, inspect foam padding to ensure it provides the necessary comfort and support. Remember to check foam condition to determine if it needs replacing.
Next, measure and cut your new fabric. Add a bit extra for tucking. Choose a fabric that’s durable and comfortable. You want it to last!
For the seat, staple the fabric tightly. Add cushioning if needed. Coconut fiber is a great choice for support. Remember to inspect the condition of the cushioning to ensure maximum comfort.
Now, move on to the arms. Line up the fabric patterns and secure them with staples. Keep it neat and tidy.
For the wings, stretch the fabric over and tuck the edges in. Add some fun piping or lace for a stylish finish. Your chair will look amazing! You can do this!
Finishing Touches and Reassembly
Finishing touches are important for reassembling your wingback chair. Start with a final inspection. Check staple lines and tighten any loose screws. Everything should feel snug and secure.
Next, add decorative accents. Use tack strips to clean edges where trim can’t cover staples. Apply hot glue to stick pretty braided trim over the staples. A few upholstery nails along the seams can really make it pop. Additionally, consider using high-quality leather that can withstand wear and tear for long-lasting results.
Don’t forget the underside. Attach a dust cover tightly with heavy-duty staples. Finish those raw edges for added durability, and ensure that the cover is securely affixed to protect the chair’s structural integrity.
Give the whole chair a good clean with a fabric brush or vacuum. This removes any dust bunnies. Spot any loose threads? Trim them away quickly. Additionally, ensure that the chair’s structural integrity is intact before finalizing the assembly.
Now, your fabulous wingback chair is ready for use!
Frequently Asked Questions
What Type of Fabric Is Best for Reupholstering a Wingback Chair?
Choosing the right fabric for a wingback chair matters a lot. Look for strong materials that last. Leather and microfiber are great options. They withstand wear and tear. Textured patterns add beauty and style. Think about colors that match your room. A good balance of durability and design is key. This way, your chair stays comfy and looks great for years.
How Much Fabric Do I Need for a Wingback Chair?
You need about 8 to 12 yards of fabric for a wingback chair. Measure your chair carefully. Check all dimensions to ensure you have enough fabric for every part. Consider any patterns on the fabric. Plan for extra fabric if the design needs matching. It’s best to buy a little more than you think you need. This way, you’ll have enough for mistakes or adjustments. Enjoy your project!
Can I Reupholster Without Professional Help?
About 70% of DIY fans feel proud after reupholstering furniture. You can definitely reupholster without hiring a pro. DIY methods save money and teach you new skills. The process is rewarding and fun. Start by choosing your fabric. Measure your furniture carefully. Remove old fabric with a staple gun or scissors. Attach the new fabric tightly. Use a staple gun to secure it. Take your time and enjoy the work. With patience, you can create something beautiful. Reupholstering gives old furniture a fresh look. It can also give you a sense of achievement. Get started on your project today!
How Long Does Reupholstering a Chair Typically Take?
Reupholstering a chair can take time. Preparing the chair may take 8 to 14 hours. The overall process can take longer, especially for DIY projects. Complexity matters. Simple chairs are quicker to finish. Your skill level also affects the time. Sometimes, it can take weeks to complete. Plan ahead and give yourself enough time. Enjoy the transformation!
What Tools Are Essential for Reupholstering a Chair?
Reupholstering a chair requires essential tools. Start with a staple gun. It quickly secures fabric in place. You’ll also need fabric scissors. They cut through upholstery easily. A measuring tape helps you get the right sizes. Don’t forget a screwdriver for removing old parts. A hammer can help with stubborn staples. Use a fabric marker to mark cutting lines. Finally, grab some pliers for pulling out old staples. With these tools, you can turn a worn-out chair into a beautiful piece. Happy reupholstering!
Conclusion
You’ve given new life to that old wingback chair. It’s now a stylish piece that stands out. Perfect for relaxing and enjoying your favorite shows. Watch out for staples, though! They can be tricky. With some practice, your reupholstering skills will shine. Friends and family will admire your handiwork. Celebrate this achievement! Make that chair the centerpiece of your living room. Enjoy your beautiful work!