
How to Fix a Cracked Leather Chair
This post contains affiliate links. As an Amazon Associate, we earn from qualifying purchases.
To effectively fix a cracked leather chair, begin by cleaning the surface with a damp cloth and mild soap. Next, evaluate the depth of the cracks; for deeper ones, select a quality leather filler. Apply the filler in thin layers, allowing each layer to dry before adding more. Once the cracks are filled and the surface is smooth, seal it with a leather sealer. To keep your chair looking great and prevent future cracks, regularly apply a good leather conditioner. For those interested in a more detailed explanation, additional tips will follow.
Essential Facts in 30 Seconds
- Clean the leather with a mild soap solution to eliminate dirt and oils.
- Assess the depth and width of the cracks for appropriate repair tools and materials.
- Gently sand the cracked area with 600-grit sandpaper for a smooth surface.
- Apply high-quality leather filler in thin layers, allowing each layer to dry completely.
- Finish with a leather sealer and conditioner to protect the repair and maintain appearance.
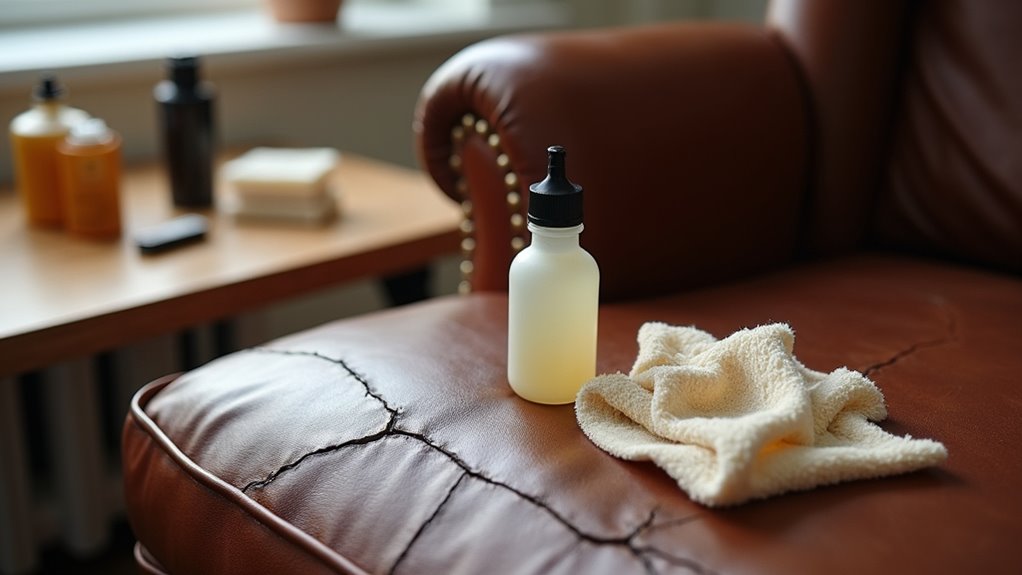
Cleaning the Leather Surface
Cleaning your leather chair is very important and simple! Start with a soft microfiber cloth or a vacuum with an upholstery attachment. Gently wipe away dust and dirt. Do this regularly, especially around seams. This helps stop dirt from getting stuck in the leather. No water yet!
Next, mix warm water with a few drops of mild soap for a gentle cleaner. Vinegar mixed with water works too! Test this on a hidden spot first. Dampen your cloth and wipe the leather from the top down in light circles. Rinse and wring your cloth often. This prevents spreading grime. Regular cleaning helps maintain the softness, color, and shine of the leather, while gentle leather cleaners are recommended to avoid damage. Remember, using a mixture of vinegar and olive oil can also nourish and condition the leather effectively. Additionally, regularly cleaning the leather can help prevent ink stains from setting in and becoming more difficult to remove.
For stubborn stains, a little gentle rubbing usually helps. Keep your leather looking great. It deserves some care!
Preparing Cracks for Repair
Get those cracks ready for repair!
First, check how deep and wide they are. This helps you choose the right tools. To prevent leather cracking, it’s essential to assess and treat any visible damage early on. Additionally, cleaning the area well ensures that any dirt or oils do not interfere with the repair process. Make sure to use rubbing alcohol for an effective cleaning before starting the repair.
Next, clean the area well. A clean surface makes sanding easier. This way, your repair job will be smooth and effective! Remember that regular cleaning of the leather chair can help prevent future damage.
Assessing Crack Severity
Spotting the difference between a minor crack and a serious one in your leather chair is important. Start by checking how deep the cracks are. Surface-level cracks aren’t too bad. Deep cracks can hurt the leather’s strength. Regular lubrication with natural oils is essential to maintain leather’s beauty and flexibility. Additionally, ensure you gather necessary supplies before starting your repair process. Next, assess the type of leather. Is it aniline or pigmented? This choice affects your repair materials. Measure the crack’s length to know how much filler you need. Make sure to clean the area before applying any treatments, as this will promote better adhesion. A clean surface is crucial for achieving a strong bond during the repair. Check for dampness too. Dry leather is key for a good fix. With these steps, you can tackle those cracks confidently. Take action and restore your chair!
Sanding Techniques Explained
Fixing cracks in your leather chair requires the right sanding technique. Start with 600-grit sandpaper or finer. This helps prevent scratches on the leather. Regularly checking the depth and size of scratches can also guide your repair efforts. Additionally, using leather repair glue is important to ensure a solid bond during the repair process.
Sand gently with light pressure. This way, you protect the leather’s beauty. Always sand in the direction of the grain. Think of it like brushing hair. It should feel smooth and easy.
As you sand, check for smoothness with your fingers. Tap off any dust between passes. Small ridges are normal. Leather often has natural imperfections. A proper assessment of damage will guide your repair process effectively.
Get ready to see those cracks disappear! Your chair will look refreshed and beautiful.
Cleaning Before Repair
Before repairing cracks in your leather chair, clean it well. This step is key. A good cleaning helps repairs stick and look nice. Follow these steps to get started:
- Dust Removal: Use a microfiber cloth or a soft brush to remove dust and dirt.
- Cleaning Solution: Mix one part non-alkaline soap with eight parts distilled water. This makes a gentle cleaner. You can also blot the area with a paper towel to remove any excess moisture.
- Gentle Wiping: Dampen your cloth with the solution. Wipe the leather gently. Avoid too much moisture. Regular cleaning helps maintain the leather’s softness and appearance.
Always test your cleaning solution on a hidden area first. It’s a smart move! This ensures that you won’t cause any further damage to the leather during the cleaning process.
With the right tools and cleaners, you’ll fix those cracks like a pro. Great job for taking care of your leather chair!
Applying Leather Filler
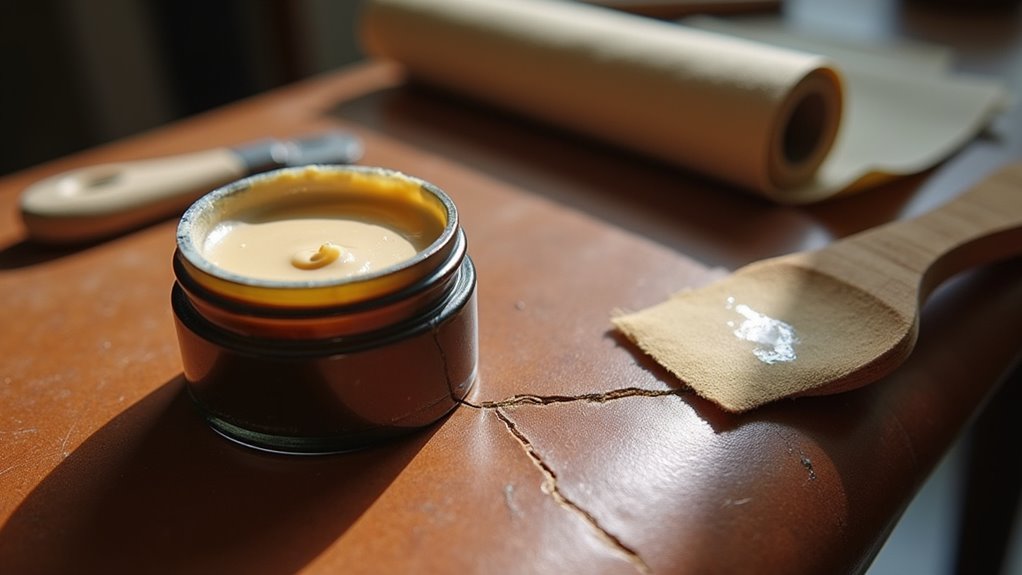
Applying leather filler is a great way to fix damage. Choose a high-quality filler for the best results. Quality fillers make your repairs last longer and look nicer.
Apply the filler in thin layers. Thin layers dry faster and help avoid bumps. Each layer needs time to dry before adding another. This keeps the finish smooth and nice.
With the right technique, your leather chair will look fabulous again. Take your time and enjoy the process!
Selecting Quality Filler
Selecting a quality leather filler is key for your repair project. A good filler helps your cracked chair look new again.
Focus on important filler properties like flexibility and adhesion. Here are some helpful tips:
- Use Heavy Fillers for deep cracks needing a solid base. These fillers provide a strong base that can withstand wear.
- Choose Elastic Fillers like Leather Flexifil for flexible areas. These types of fillers allow the leather to move without cracking.
- Pick Colour Specific Fillers that match your leather perfectly.
With the right filler, your chair will regain its charm. A quality filler not only fixes cracks but also stops them from returning, helping to maintain the leather’s natural appearance and longevity. Additionally, selecting a filler that provides good adhesion ensures a long-lasting repair.
You can do this!
Application Techniques Explained
Get ready to apply leather filler. Start by cleaning the leather. Remove all dirt and oils. Make sure the surface is completely dry. Proper cleaning is essential for effective repairs, as removing residue can significantly enhance adhesion.
For a tear, put a sub-patch underneath. Glue the edges down securely.
Now, it’s time to apply the filler. Scoop some filler with a spatula. Press it into the tear, starting from the edges. Leave a small valley for smoothness later. Spread it out and feather the edges. This helps it blend well with the leather.
Work quickly because some fillers cure fast. Keep a steady hand. Think of it like painting. Avoid any mess.
With these simple steps, your chair will look great again in no time! Additionally, ensure that the area is completely dry before repair, as dampness can interfere with adhesive or repair products.
Layer Drying Importance
Repairing a cracked leather chair? Use layer drying for the best results! This method helps the leather filler dry evenly.
Here’s why layer drying matters:
- It stops cracking and shrinkage while the filler dries.
- It strengthens the bond between the filler and leather.
- It makes sanding and color application smoother.
- Proper layer application is crucial for achieving a seamless repair.
Using layer drying means your repairs last longer. Enjoy a better-looking chair with this simple technique!
Sealing and Coloring
Sealing and coloring your cracked leather chair is an easy project. With a few simple steps, you can make it look new again. Start by getting a leather sealer. Use a soft cloth or sponge to apply it. Rub the sealer into the cracks and any repaired areas. For better protection, add a second coat after the first dries. Let the sealer dry completely in a cool area. Keep it away from direct heat or sunlight.
Next, it’s time to match the color. Clean the leather with mild soap or a leather cleaner. Make sure it’s completely dry. Choose a high-quality leather dye that matches your chair’s color.
Apply the dye in thin layers, following the leather grain. Let each layer dry before adding another. With a little effort, your chair will look fabulous again. It’s a great way to save money and enjoy your furniture!
Post-Repair Maintenance
After sealing and coloring your cracked leather chair, it’s time for some post-repair care.
Keeping your chair looking great requires regular maintenance. Here are some easy steps to follow:
- Start with cleaning: Wipe the leather to remove dirt and oils. This makes the conditioner work better.
- Use good conditioner: Choose a high-quality leather conditioner. Apply a small amount in circular motions. Let it soak in overnight for great results.
- Watch the environment: Keep your chair away from direct sunlight and heat. This helps prevent the leather from drying out.
Regular care keeps your chair beautiful and lasting longer. Enjoy your refreshed chair!
Special Considerations for Deep Cracks
Deep cracks in your leather chair can be fixed easily. Start by checking how deep and long the cracks are. This helps you choose the right repair method. Make sure to use a high-quality leather filler made for deep cracks.
Clean the area first. Use mild soap or a leather cleaner. Test it on a hidden spot to be safe. After cleaning, let it dry completely.
Apply the filler with a palette knife. Scrape off any extra filler. Let it dry for a few hours. Your chair will look much better!
If the cracks are too bad, call a professional. Happy repairing!
Tips for Preventing Future Cracks
After fixing those annoying deep cracks, it’s time to protect your leather chair. Keeping it looking great is easy with a few simple steps.
Prevent cracks by following these tips:
- Keep your chair away from direct sunlight. Sunlight can dry out the leather.
- Use leather conditioner often. This keeps the leather soft and flexible.
- Clean your chair carefully. Use products made for leather to avoid damage.
These steps will help your leather chair stay in great shape for years to come.
Frequently Asked Questions
Can I Use Regular Glue for Leather Crack Repairs?
Regular glue does not work for leather crack repairs. It cannot bond properly and stays stiff. For best results, use a leather-specific adhesive. These types of glue are made to stay flexible. Make sure to let the glue dry completely. This will ensure a strong and lasting repair. Take your time for the best outcome.
How Can I Determine the Type of Leather I Have?
To find out what type of leather you have, follow these simple steps. First, look at the grain patterns. Different types of leather have unique designs. Next, feel the texture. Is it soft or rough? This can tell you a lot. Check how flexible the leather is. Some types are stiffer than others.
Try the water test. Put a drop of water on the leather. If it absorbs quickly, it might be genuine leather. If it beads up, it could be synthetic. Lastly, do a scratch test. Lightly scratch an area. Real leather will show some marks, while fake leather might not.
These easy methods will help you identify your leather type. Understanding this can help you care for it better.
Is It Safe to Use Heat to Speed up Drying?
Heat might seem like a fast way to dry leather, but it can cause damage. High temperatures lead to cracks and brittleness. To keep your leather looking great, always choose natural air drying. This method is gentle and helps maintain the leather’s beauty and durability. Take care of your leather, and it will last longer.
What if My Leather Chair Has a Strong Odor?
A strong odor from your leather chair can be bothersome. Start by cleaning it well. Use a soft cloth to wipe down the surface. Mix equal parts of vinegar and water for a natural cleaning solution. This helps to neutralize the smell.
Condition the leather after cleaning. Use a good leather conditioner to keep it healthy. Regular maintenance is key. Clean your chair often to prevent odors from building up.
Keep the chair in a well-ventilated area. Fresh air helps reduce bad smells. If the odor persists, consider professional cleaning. A little care goes a long way in keeping your leather chair fresh and inviting.
Can I Repair a Leather Chair With Vinyl Filler?
Vinyl filler can help with small leather repairs. It works well on cracks and scratches. This filler is great for quick, cosmetic fixes. For bigger damage, use a specialized leather filler. It gives better results and lasts longer. Always clean the area before applying any filler. Follow the instructions on the product for the best outcome. Regular maintenance keeps your leather looking good.
Conclusion
Get ready to fix that cracked leather chair! With a bit of effort, you can restore it to its former glory. It’s amazing how a few simple steps can bring your favorite seat back to life. Regular maintenance will keep your chair comfy for years. Gather your supplies and start this fun project today!
First, clean the chair with a gentle soap and water mix. Make sure to remove all dirt and oils. Next, use a leather conditioner to nourish the leather. This helps prevent further cracking.
For deeper cracks, consider using a leather repair kit. Follow the instructions carefully for the best results. Once done, let it dry completely.
Finally, apply a leather protectant. This will help shield your chair from future damage. Enjoy your beautifully restored chair!