
How to Fix a Ripped Leather Chair
This post contains affiliate links. As an Amazon Associate, we earn from qualifying purchases.
If you have a ripped leather chair, you can easily fix it by following a few simple steps. First, assess the damage—determine if it’s just a scratch or a larger tear. Clean the affected area with a leather cleaner, then cut a patch from a sturdy material that is larger than the rip. Use glue to adhere the patch, allowing it to dry fully. Next, fill the tear with leather filler, smoothing it out to create a seamless finish, and add texture to match the surrounding leather. Finally, seal the repair for added protection. For those interested in a more detailed explanation and additional tips, further information will follow.
Essential Facts in 30 Seconds
- Assess the damage by identifying the tear type and checking for structural issues or mold.
- Clean the damaged area thoroughly and prepare a sub-patch with strong, compatible materials.
- For small tears, apply leather repair filler cream in thin layers, smoothing with a spatula.
- Use grain paper to texture the repair, matching the existing leather.
- Seal the repair with a suitable finisher for durability.
- Regularly clean and condition the leather to maintain the chair and check for new damage.
Assessing the Damage
Let’s dive into assessing the damage on your leather chair.
Start by spotting the types of damage. Look for surface scratches, small tears, or larger rips. A magnifying glass can help you see better. Inspect the size and shape of any marks.
Next, feel the surface. It should be smooth. If it feels rough or soft, deeper problems may exist. Surface-level scratches can often be repaired using simple DIY methods. Additionally, cleaning the area around the damage is essential for effective repair. Proper assessment of damage is key to selecting the best repair method.
Check the firmness of the leather. Press gently on it. If it sags or feels weak, structural damage might be present. Be sure to evaluate the overall condition of the leather chair to determine the best repair approach.
Lastly, take a whiff. A musty smell can indicate stains or mold.
Use these tips to identify the damage. You’re on your way to figuring out what to do next! Great job taking the first step!
Preparing the Area
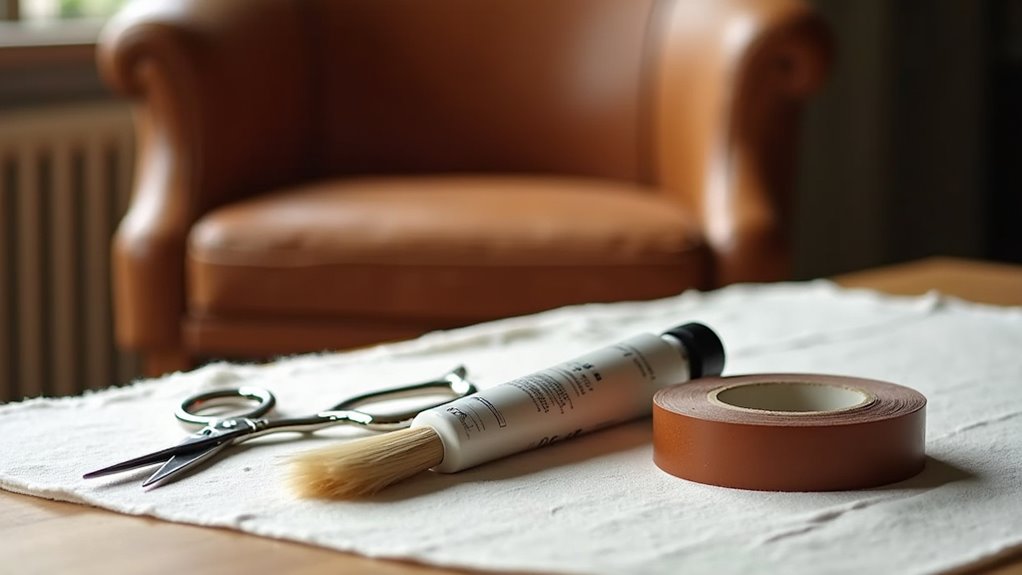
Before fixing that ripped leather chair, prepare your workspace. Clear away any clutter first. Dust and debris can ruin your repair. Good lighting helps you see the damage clearly.
Use a specialized leather cleaner and a soft cloth to clean the chair, especially the tear. Avoid harsh chemicals. After cleaning, let it dry completely. Proper leather cleaning is essential for a successful repair process. Additionally, ensure that the cleaner is suitable for maintaining leather chairs to avoid any adverse effects. The cleaning process is a crucial first step to ensure the repair materials bond well. Remember that cleaning the area thoroughly can enhance the effectiveness of the adhesive used during the repair.
Next, inspect the damaged area closely. Use fine scissors to trim any frayed edges. This creates a smooth surface. Lightly sand around the rip with fine-grit sandpaper. This helps with better adhesion.
After sanding, clean up any dust again. Keeping things neat is important.
With your workspace ready and cleaning done, you’re set to repair that chair like a pro. Great job preparing!
Applying a Sub-Patch
Let’s get started with applying a sub-patch! First, choose a strong material. Linen or leather patches work well. They blend in nicely and keep your item looking sharp. Additionally, using DT-156 Leather Adhesive is recommended for securely attaching the sub-patch to ensure a lasting repair. This adhesive is essential for promoting better adhesive bonding and ensuring durability. Remember that cleaning the area around the damage is crucial for a successful repair. Regular cleaning and conditioning can help prevent future damage to your leather chair.
Next, cut the patch to the right size. Make sure it fits perfectly.
Now, it’s time to add adhesive. Use a small amount. A little goes a long way. Don’t apply it like peanut butter!
Press the patch firmly onto the surface. Hold it for a few seconds to ensure it sticks.
Let it dry completely before using the item again. Enjoy your newly patched piece!
Sub-Patch Material Selection
Ready to fix that ripped leather chair? Picking the right sub-patch material is essential. Think of it like choosing the best pizza toppings. Strong materials, like linen, work well for big holes. They provide support without sticking out.
Keep your patch thin to avoid bulging. Select leather or vinyl patches that match the chair’s texture. No one wants a patch that shouts “I’m a repair!” Stay away from PU or polyester faux leather. They don’t bond well and can cause issues later. A good adhesive bond is crucial for a long-lasting repair.
For adhesives, heat-activated options are great. They offer a strong hold. Cut your sub-patch at least half an inch larger than the rip. This extra size helps with a secure fit. To ensure the best repair, remember to clean the area thoroughly to remove any dirt and oils before applying your patch.
Let’s make that chair look fabulous again. You’ve got this!
Adhesive Application Techniques
Getting your adhesive application just right makes a big difference in fixing that ripped leather chair.
Start with a clean area. Trim any loose edges for a smooth repair. Use the right adhesive, like leather-specific super glue or contact cement. This ensures a strong bond. Regular maintenance of the leather can help prevent future damage, including regular conditioning, which can keep the leather supple and prevent cracks.
A neat patch looks better. Strong bonds mean lasting repairs. You’ll feel like a DIY superstar!
Apply a thin layer of adhesive along the tear edges and on the sub-patch. Wait until it feels tacky, then press it firmly into place.
Make sure everything is snug with no gaps. Let it cure undisturbed for maximum strength. Regularly applying leather conditioner can help maintain the overall quality of your chair.
With these tips, your chair will look fabulous. Get ready for cozy seating!
Filling the Tear
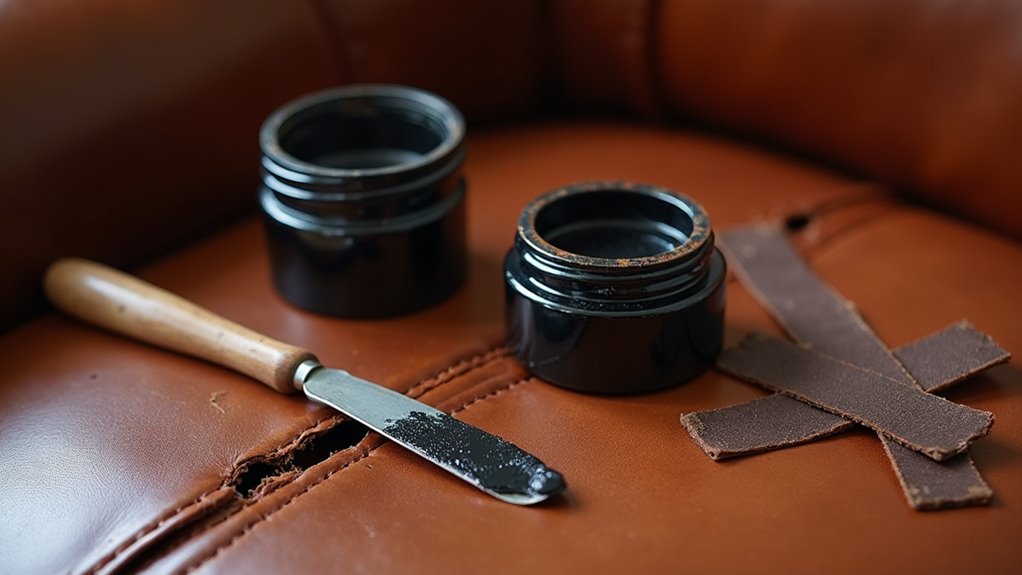
Filling a tear in your leather chair is easier than it seems. Start by gathering your repair tools. Check the size of the tear. If it’s smaller than a tennis ball, you can fix it. Trim any rough edges to make it neat. If there are any torn flaps, try to position them back.
Next, select your filler materials. Leather repair filler cream works well for small tears. Clean the area with leather cleaner first, as this helps the filler stick better and ensures proper cleaning techniques are employed. Remember, ink stain removal can be manageable with the right approach, which is crucial when dealing with any potential stains during the repair process.
Apply thin layers of the filler over the tear. Use a spatula to press it in and smooth it out. Remember to apply leather conditioner afterward to restore natural oils.
After applying the filler, let it dry completely. Once dry, you can buff the area for a shiny finish. Your leather chair will look great again!
Texturing and Finishing
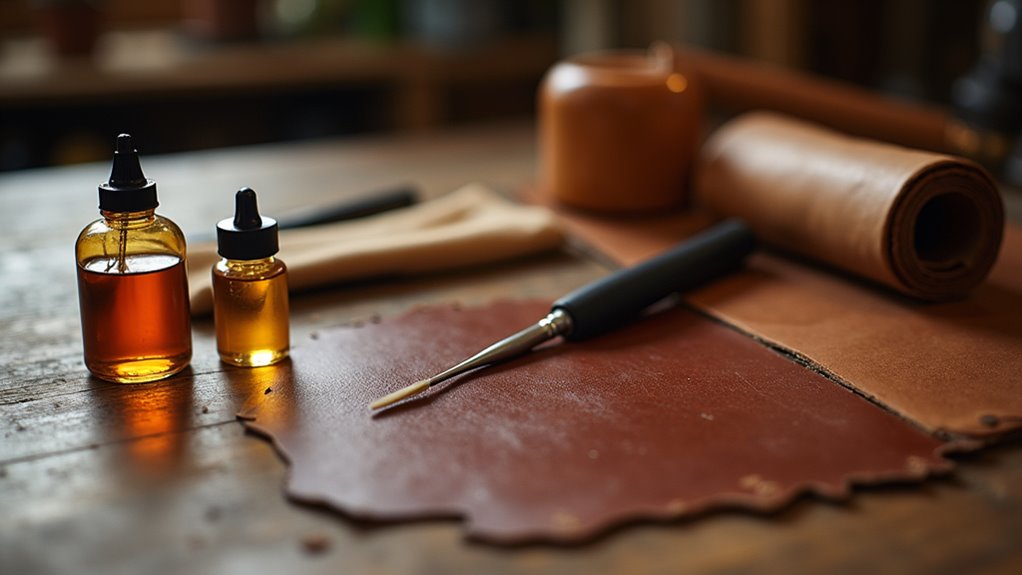
After filling the tear, it’s time to make the repair blend in. Grab some grain paper.
Carefully emboss the texture onto the filler. This step helps the repair match the rest of your chair.
Once you finish texturing, seal everything with a finisher. This protects your work.
Watch your chair transform back to its former glory! Enjoy the results. Your hard work will shine through.
Applying Grain Paper
Adding texture back to your leather chair is easy with grain paper. This simple tool helps match the texture of your repair to the original leather. It makes your chair look great again.
Feel proud as you restore your chair. Enjoy the feeling of success, like a DIY superhero! Your chair will shine, making you smile every time you sit down.
Start with a heat-cured compound. Then, place the grain paper over it. Use a protective layer and heat it just right.
With patience, you’ll see the great benefits of grain paper. Your chair will have a stunning finish!
Sealing With Finisher
After restoring the texture of your leather chair with grain paper, sealing is next.
Pick your finisher type. Matte gives a subtle look. Gloss adds shine. Satin offers a classy middle ground.
Make sure the painted surface is completely dry. Wait at least 24 hours.
Use a clean brush or sponge. Apply thin, even coats. Work on small sections to avoid missed spots.
Let each coat dry fully before adding another. Aim for two to three coats.
Once done, let the chair cure for 24 hours. No peeking! Regular cleaning with a vinegar and olive oil mixture can help maintain the finish.
Soon, your chair will shine like a pro. Enjoy your beautifully finished piece!
Maintaining the Repair

To keep your leather chair in great shape, regular maintenance is essential. A good routine helps make your repair last longer. Here are some easy steps to follow:
- Clean gently with a water-based leather cleaner. Avoid soaking your chair.
- Check for new cracks or tears often. Catching problems early makes a big difference; regular maintenance can prevent further damage.
- Keep it away from sunlight and heat. Your chair shouldn’t feel like it’s on vacation in the sun!
- Condition your leather regularly. Let it soak overnight to keep it soft. Regular cleaning with a vinegar solution can also help maintain the appearance of your leather.
- If spills happen, like ketchup, clean them up fast.
With these simple tips, your chair will remain beautiful and comfy for years. Celebrate your hard work in keeping it in top shape!
Frequently Asked Questions
Can I Use Regular Glue Instead of Leather Adhesive?
Regular glue is not good for fixing leather. It doesn’t stick well or stay flexible. Leather needs special glue made for it. This type of glue gives better results. It lasts longer and holds up in different conditions. For the best repairs, always choose leather adhesive.
How Long Does a Leather Repair Typically Last?
A leather repair does not last forever. With good care, repairs can last for several years. Neglect can cause repairs to wear out quickly. Regular cleaning and conditioning help maintain leather. Proper storage also plays a key role. Take care of your leather items for longer-lasting repairs.
Is It Possible to Repair Bonded Leather?
Repairing bonded leather is possible. You can use glue and fillers for quick fixes. These methods work for minor damage but are not long-lasting. They mainly improve the look. For a better solution, consider replacing it. A new item will last longer and look better. Remember, bonded leather is not as strong as real leather. So, weigh your options carefully.
What Should I Do if the Tear Keeps Reopening?
A tear that keeps reopening needs special care. Use a strong sub-patch to prevent future damage. High-quality adhesive is essential for a good bond. Make sure to clean the edges well before applying the patch. Clamps can help hold everything in place while it dries. These steps will help create a lasting repair. Stay patient and check the patch regularly. With the right tools and methods, you can fix that tear for good.
Can I Dye the Leather After the Repair?
Dyeing leather after a repair is possible and can be done successfully. Pick a dye that matches the original color well. This ensures a seamless look. Prepare the leather surface carefully. Clean it and make sure it’s dry. This helps the dye stick better. Apply the dye evenly for the best results. This will make your leather item look fresh and new again.
Conclusion
Fixing a ripped leather chair is easier than it seems. Follow these steps to make your chair look great again. First, clean the area around the rip. Use a damp cloth to remove dirt. Next, apply leather glue or a patch kit. Press the edges of the rip together. Hold it for a few minutes until it sticks.
For larger rips, use a leather patch. Cut the patch to fit the rip. Use glue to attach it. Smooth out any wrinkles. Allow it to dry completely.
After the repair, use leather conditioner. This keeps the leather soft and shiny. Your chair will now have character and charm. Enjoy your comfy seat and give it some love! Happy repairing!