
How to Repair a Leather Chair
This post contains affiliate links. As an Amazon Associate, we earn from qualifying purchases.
To repair a leather chair, start by identifying the type of leather you have—whether it’s full-grain or top-grain. This will help you understand the appropriate care methods. Next, inspect the chair for any damage such as scratches or stains. Clean the surface gently with a damp cloth and mild soap, being careful not to soak the leather. For holes, use a repair kit that includes matching dye and follow the provided instructions. Remember to apply a monthly conditioner to keep the leather in good condition. If you encounter a spill, act quickly; it can often be cleaned up easily. For those interested in more detailed steps and tips, further explanations will be provided later in the article.
Essential Facts in 30 Seconds
- Identify the leather type for appropriate cleaning and repair methods.
- Clean the damaged area with a mild leather cleaner or damp cloth.
- Assess damage with a magnifying glass to see if professional help is required.
- Use color-matched dyes and repair kits for minor damage fixes.
- Regularly clean and condition leather to extend its lifespan and prevent damage.
Identifying the Type of Leather
To identify the type of leather in your chair, start by feeling it.
Full-grain leather feels slightly rough and shows natural pores. It’s tough and has unique imperfections. This type of leather is high-quality, strong, and develops a patina over time. It is also known for its durability and resistance to wear. Additionally, regular conditioning of full-grain leather can enhance its longevity. Proper maintenance is essential to keep it looking its best.
Top-grain leather feels smoother and softer. It has been sanded a bit for a nicer look.
Be cautious of split leather. It’s rough and lacks the beautiful grain. It’s not ideal for high-end furniture.
Bonded leather feels more like plastic. This type isn’t genuine leather.
Nubuck offers a velvety texture. Aniline leather shows off its natural grain.
Each type has its own charm. Grab a friend and inspect your chair. Discover its secret identity. Understanding the different leather types can help you choose the right repair method.
Leather can be exciting!
Inspecting the Damage

Let’s get started on fixing your leather chair! First, find out what type of leather it is. This helps you choose the right cleaning and repair method. Next, check the chair for damage. Look for scratches, tears, or stains. Each type of damage may need a different approach. Clean the area gently. This prepares it for repairs and makes the job easier. To effectively assess the damage, use a magnifying glass to identify the extent of scratches or gouges. Remember that smaller tears are generally easier to repair than larger ones. For larger rips, it is important to consider sewing before using a repair kit. Additionally, for larger holes, cutting a patch slightly larger than the hole will ensure a good bond. Gather your repair supplies. You might need leather cleaner, a soft cloth, and a leather repair kit. Follow the instructions on the kit for the best results. With the right steps, your chair can look good as new!
Identify Leather Type
Identifying the type of leather on your chair requires some simple steps.
Use these tips to recognize leather features:
- Check for natural grain patterns. Real leather has unique flaws.
- Sniff it! Genuine leather has a warm, earthy smell. Faux leather smells like plastic.
- Feel the texture. Is it smooth and soft (top grain) or rugged and bumpy (full grain)? Real leather is soft yet firm, balancing plushness and support. Additionally, the assessment step is crucial for effective repair, as it can help you determine the best approach for any damage. Regular evaluations can help prevent further damage. Proper cleaning and conditioning are essential for maintaining leather quality over time.
- Inspect the edges. Real leather shows fibrous layers. Bonded leather looks artificial.
- Look at the price tag. If it’s too cheap, it’s probably not real leather.
With these tips, you’ll become a leather detective!
Happy hunting!
Assess Damage Extent
Evaluating the damage on your leather chair is like being a detective!
Start with a visual check. Look closely for tears, scratches, or discoloration. Run your fingers over the surface. Feel for rough spots or cracks. This helps you understand how serious the damage is. Is it just a surface scratch or a deep gouge? It’s also important to identify different types of stains that may require specific cleaning methods. For instance, removing pen ink can be particularly tricky if not addressed quickly.
Then, check the size and location of the damage. Measure it and see if it’s near seams or stress points. Knowing the extent of the damage is crucial. It helps you pick the right repair methods. Additionally, assessing the damage will help you determine if the leather is severely damaged and requires professional assistance.
With a solid damage assessment, you can tackle those repairs. Soon, your chair will look great again!
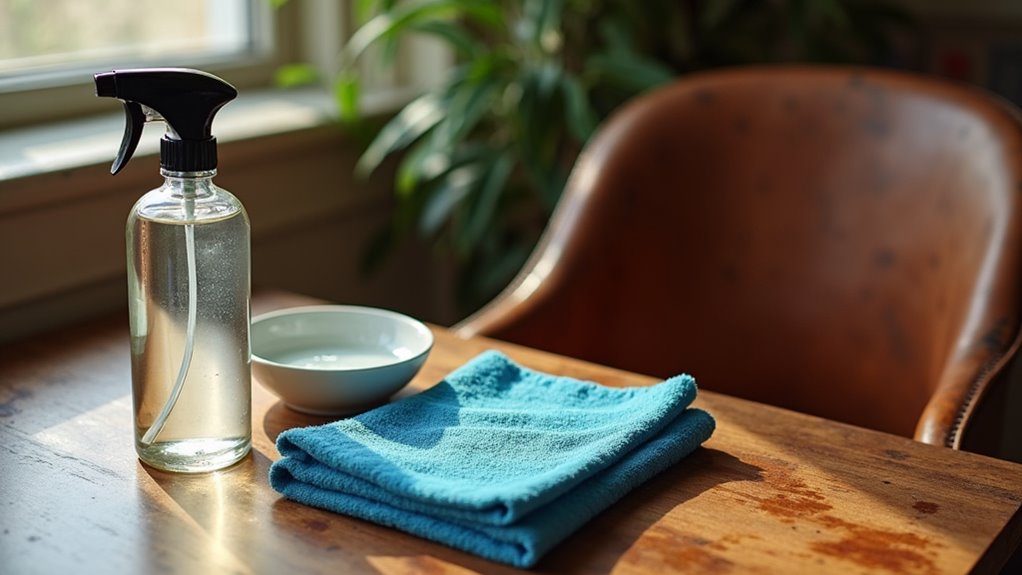
Clean Affected Area
After checking the damage, clean the affected area. Your leather chair needs to be ready for repair. Use a mild leather cleaner or a damp cloth with mild soap. Gently wipe the damaged section. It’s important to ensure that the leather is not soaked, as too much water can damage it.
Here are some tips:
- Don’t soak the leather. Too much water can damage it.
- Clean in circular motions for an even look.
- Focus on stains and dirty spots.
- Allow the area to air dry completely before continuing.
- Dust off any debris first to help conditioners work better. Regular dusting of the chair can significantly enhance the effectiveness of the conditioners. Conditioning the leather helps maintain its hydration and flexibility, preventing future damage. Additionally, consider using a natural cleaner made from vinegar and olive oil to effectively clean the leather chair.
Follow these steps for great leather care. Spilled ketchup? Let’s make that stain disappear!
Cleaning the Affected Area
Get that leather chair looking sharp again!
Start with the right cleaner. Use a mild mix of soap and water or white vinegar. This keeps the leather safe. For added protection, consider using a commercial leather cleaner specifically designed for leather.
Grab a soft cloth. Wipe away dirt and oils gently. If you notice any ink stains, be sure to act quickly to increase the chances of successful ink stain removal.
Let the area dry completely before moving on.
It’s simple and effective! Additionally, if you happen to notice any ink stains, it’s important to act quickly to increase chances of successful ink stain removal.
Choose Appropriate Cleaner
Cleaning your leather chair requires the right cleaner. The right choice makes a big difference! Different types of leather need different cleaners. For example, aniline leather and pigmented leather aren’t the same.
Here are some tips for picking a cleaner:
- Choose pH-balanced and non-toxic options.
- Find a cleaner that removes stains without harming the leather.
- Brands like Leather Honey and Chemical Guys are trusted.
- Select cleaners that hydrate while they clean.
- Read product reviews to see how well they work.
Additionally, make sure to clean the area around the hole thoroughly before applying any repair products.
Make your leather chair look great with the best cleaner!
Remove Dirt and Oils
Cleaning dirt and oils off your leather chair is simple and effective. Start by inspecting your chair closely. Look for stains or areas where the color has faded. Use a soft cloth or duster to wipe away dust. A vacuum with a brush attachment helps clean hard-to-reach spots.
For your cleaning solution, mix mild soap with distilled water. Dampen a microfiber cloth with this solution. Gently blot the stains using circular motions.
For tough stains, a vinegar solution or rubbing alcohol works well. Always spot test first to avoid damage. Regular maintenance, including cleaning and conditioning, is essential to preserve your leather chair’s appearance.
With these steps, you’ll keep your leather chair looking great!
Allow Area to Dry
After cleaning your leather chair, let it dry well. This step is key for good care. Follow these tips for the best results.
Blot any extra moisture with a clean cloth. Don’t rub the leather. Place the chair in a spot with good air flow. This helps the chair dry faster.
Stay away from direct sunlight. Sun can cause fading and cracking. Use absorbent materials like newspaper to pull out moisture inside the chair.
Check all seams and cushions for hidden dampness. Make sure everything is fully dry. Taking these steps keeps your leather chair looking great!
Gathering Repair Kits and Tools
Gathering the right repair kits and tools sets you up for success.
Think of it as preparing your superhero station. Start with your repair kits. Basic kits work well for small fixes. Deluxe kits have everything needed for big repairs. Don’t forget color-matched dyes. They help your fixes blend in perfectly!
Next, prepare your tools. Get application tools like palette knives and foam sponges for smooth spreading.
Cleaning supplies are also important. Alcohol wipes will get the surface ready. For tears, use sub-patches. They’re your secret weapon for strong repairs!
Repairing Tears and Holes
Get your repair kits and tools ready. It’s time to fix those tears and holes in your leather chair. Follow these simple steps for a great repair.
First, check the size of the tear. If it’s smaller than a tennis ball, you’re good to start. Next, trim any rough edges around the tear. This gives a clean look.
Now, clean the area well. This helps the leather bond with your patch. Then, place a sturdy sub-patch behind the tear for extra support.
Apply flexible leather glue along the edges. Press firmly to secure the patch. Keep it in place while the glue dries.
Let the filler dry completely before you sand and color it. With some effort, your chair will look fantastic.
Enjoy years of cozy lounging! You did a great job!
Fixing Peeling and Flaking
Fixing a peeling or flaking leather chair is simple. Start by cleaning the area with a soft cloth and mild leather cleaner. This makes sure the surface is clean for better adhesion.
Next, gently remove any loose flakes using fine sandpaper or your fingers. Be careful not to touch the seams.
Use flexible adhesives designed for leather to glue down the edges. After that, apply leather filler putty with a putty knife in thin layers. Let each layer dry completely before adding more.
When the surface looks smooth, find a paint or dye that matches the leather color. Patience is important during this process.
Finally, apply a protective top-coat to keep your repairs safe. Your chair deserves some care!
Maintenance and Prevention
Caring for your leather chair is easy and important. With just a few steps, you can keep it looking great and feeling cozy for years.
Start by cleaning it regularly. Use a dry microfiber cloth to dust off dirt and debris. For spills, remember to blot the area, not rub it.
Here’s how to maintain your chair and prevent damage:
- Apply leather conditioner each month to keep it moisturized.
- Use a damp cloth for light cleaning. Avoid strong chemicals.
- Rotate the cushions to spread out wear and tear.
- Keep the chair out of direct sunlight to stop fading.
- Store it in a cool, ventilated area when not in use.
Accidentally spilled ketchup? No worries!
Follow these tips to remove stains like a pro. With these simple steps, you’ll enjoy your leather chair for a long time!
Cost and Effectiveness Considerations
Maintaining your leather chair is important for keeping it in great shape. Repair costs and effectiveness vary. Here’s a quick look at the options available.
| Repair Type | Cost Range | Effectiveness |
|---|---|---|
| Minor DIY Repairs | $15 – $50 | Good for small fixes |
| Major DIY Repairs | $40 – $60 | Success can vary |
| Professional Services | $100 – $600 | High durability |
| Bonded Leather Repair | $100 – $300 | Less lasting results |
| Genuine Leather Repair | $120 – $500+ | Best long-term value |
DIY kits work well for minor issues. They save money and can be fun. For serious damage, professional help is best. Pros have skills and tools for strong repairs.
Keep in mind that regular care can prevent big problems later. Protect your investment and make your chair shine again!
Frequently Asked Questions
Can I Repair Leather Chair Damage Myself or Hire a Professional?
Decide between fixing leather chair damage yourself or hiring a professional. DIY repairs work well for small problems. They are often cheaper and can be done at your own pace. But, for bigger issues, a professional might be best. They have the right tools and experience.
Think about your skills and time. Do you have the tools to fix it? How much time can you spend? Also, consider the chair’s value. A valuable chair may need a pro’s help to avoid further damage.
Both options have pros and cons. Weigh them carefully before deciding.
How Long Does a Leather Repair Typically Last?
Leather repairs can last a long time. With proper care, these repairs can survive for many years. Quality repairs can even last decades. Regular maintenance is key. Clean and condition the leather often. Avoid direct sunlight and heat. This helps keep the leather strong and beautiful. Treat your leather well, and it will reward you with longevity.
What Should I Do if Color Mismatch Occurs After Repair?
Color mismatch can be frustrating. To fix this issue, use color blending techniques. Start by applying thin layers of dye. Test the dye on a scrap piece first. This helps you see how the color will look. Adjust the color with fillers if needed. Focus on achieving a seamless finish that matches the original leather. Take your time and be patient. With practice, you can make the repair look great.
Is It Safe to Use Regular Household Cleaners on Leather?
Regular household cleaners are not safe for leather. These cleaners have harsh chemicals. They can ruin the leather’s surface and texture. Leather needs special care. Use cleaners made just for leather. They help keep the leather looking good.
Clean leather only when necessary. Too much cleaning can harm it. Wipe off dirt gently with a soft cloth. Keep it away from direct sunlight to avoid fading. Protect your leather to make it last longer. Simple care goes a long way. Your leather items will look great for years.
How Can I Prevent Future Damage to My Leather Chair?
Preventing future damage to your leather chair is easy. First, regularly apply leather conditioner. This keeps the leather hydrated and prevents cracks. Use protective covers for your chair. These covers shield against spills and sunlight. Sunlight can fade colors and dry out the leather.
Clean your chair often with a soft cloth. Dust can scratch the surface. Avoid using harsh chemicals. They may damage the leather.
Keep sharp objects away from the chair. This helps prevent cuts and tears.
With these simple steps, your leather chair can stay in great shape for years. Enjoy your beautiful chair!
Conclusion
Repairing a leather chair is easier than you think. With some effort and the right tools, you can fix it up nicely. Address small problems now to avoid bigger ones later. Clean your chair regularly. This keeps it looking good and lasting longer. Use a soft cloth and a gentle cleaner made for leather.
If you see scratches, use a leather repair kit. Follow the instructions carefully. These kits can help cover up marks and make your chair look new again.
For cracks, apply a leather conditioner. This helps keep the leather soft and prevents it from breaking.
Don’t forget to treat your chair with care. It will be a comfy spot for years to come. Show your chair some love, and it will reward you. Enjoy your newly repaired leather chair!